

Pet owners caring for service dogs or aging animals face unique challenges in fostering independence while maintaining safety and quality of life. Whether you’re supporting a mobility-impaired companion or training a service dog to communicate needs effectively, the right strategies can transform daily routines for both you and your pet. Research shows that service dogs improve mobility but also increase caregiver responsibilities, making smart independence solutions essential. This guide delivers seven evidence-backed tips to enhance communication, modify your environment, and build skills that promote autonomy without compromising welfare or adding unsustainable burden to your caregiving role.
Table of Contents
- Key takeaways
- How to evaluate and choose independence solutions for your pet
- 1. Enhance communication using buttons and non-verbal cues
- 2. Modify your home environment to support aging and mobility-impaired pets
- 3. Train your dog for key independence skills and safe behaviors
- Comparison of popular communication tools and home modifications for pet independence
- Situational recommendations for pet owner independence and communication solutions
- Discover iPupPee solutions to boost your pet’s independence
Key Takeaways
| Point | Details |
|---|---|
| Evaluation criteria | Carefully assess your pet’s mobility, communication, and self care abilities along with your time, space, and budget to choose tools that fit your daily routines. |
| Communication enhancements | Use button based signals and nonverbal cues to enable pet initiated communication and reinforce with immediate praise while gradually expanding options. |
| Age and size tailoring | Tailor solutions to your pet’s age and breed, starting around age seven for large dogs and adjusting as needs evolve. |
| Caregiver burden balance | Prioritize independence strategies that improve welfare while minimizing ongoing workload and stress for you as the caregiver. |
How to evaluate and choose independence solutions for your pet
Selecting the right independence aids requires careful assessment of your pet’s specific needs and your caregiving capacity. Start by identifying your pet’s primary challenges, whether communication barriers, mobility limitations, or age-related decline. Training should be context-specific rather than focused on general self-control, meaning solutions must address your dog’s actual daily tasks and environment.
Consider these evaluation criteria when choosing independence tools:
- Assess your pet’s physical condition, including joint health, vision, and hearing capabilities
- Evaluate your own time availability and physical ability to implement training or modifications
- Factor in your living space constraints and budget for equipment or renovations
- Prioritize solutions with objective certification or expert validation when available
- Review the psychosocial impact on both you and your pet before committing
Your pet’s age plays a critical role in solution selection. Large breed dogs often develop arthritis earlier than small breeds, requiring proactive modifications starting around age seven. Service dog handlers with mobility challenges need different communication systems than owners of aging family pets. The key is matching tools to your specific circumstances rather than adopting a one-size-fits-all approach.
Pro Tip: Create a simple assessment checklist rating your pet’s current abilities in mobility, communication, and self-care on a scale of 1 to 10. Revisit this monthly to track progress and adjust your independence strategy as needs evolve.
With clear evaluation criteria established, let’s examine the first essential tip for building effective communication with your pet.
1. Enhance communication using buttons and non-verbal cues
Communication forms the foundation of pet independence, allowing dogs to express needs, alert handlers to dangers, and initiate interactions on their own terms. Dogs recognize up to 165 words and respond to voice tone and body language, making multi-modal communication systems highly effective. Button-based tools like iPupPee enable dog-initiated signals, shifting communication control from handler to pet.
Implement these communication enhancement strategies:
- Install buttons for essential needs like water, bathroom breaks, and emergency alerts in consistent locations
- Teach your dog to recognize verbal and non-verbal cues including leash gestures and hand signals
- Use positive reinforcement immediately after successful button presses or correct responses to cues
- Vary your voice tone to convey different meanings, as dogs distinguish between praise, commands, and corrections
- Start with one or two buttons and gradually expand as your dog masters each communication option
The iPupPee button system exemplifies how service dogs understand and respond through tactile interfaces. Unlike verbal commands that require handler initiation, buttons empower dogs to communicate when they choose, fostering genuine independence. This proves especially valuable for service dog handlers who may not always notice subtle behavioral cues due to their own disabilities.
Consistency accelerates learning. Place buttons in the same spots daily and use identical verbal cues each time. If your dog shows interest in a button but doesn’t press it, model the behavior yourself while saying the associated word. Most dogs learn their first button within one to three weeks of consistent practice.
Pro Tip: Record your dog’s button usage patterns for two weeks to identify which needs they communicate most frequently. This data helps you prioritize training communication buttons for the most impactful independence gains.
Effective communication establishes the foundation for independence. Next, let’s explore physical environment adjustments that support your pet’s mobility and safety.
2. Modify your home environment to support aging and mobility-impaired pets
Physical environment modifications reduce injury risk and maintain mobility for elderly or disabled pets, allowing them to navigate independently with confidence. Arthritis affects 80% of dogs over eight years old, making proactive home adjustments essential rather than optional. For large breeds, modifications should begin around age seven, before significant joint deterioration occurs.
Prioritize these home modification strategies:
- Install ramps at stairs and furniture access points to eliminate jumping and reduce fall risk
- Replace slippery flooring with textured surfaces or add non-slip mats in high-traffic areas
- Provide orthopedic beds that cushion joints and reduce pressure on hips and elbows
- Use elevated food and water bowls to minimize neck and back strain during meals
- Ensure adequate lighting in hallways and rooms to compensate for declining vision
The following table compares common home modifications by effectiveness, cost, and implementation difficulty:
| Modification | Primary Benefit | Approximate Cost | Installation Difficulty | Best For |
|---|---|---|---|---|
| Pet ramps | Eliminates stair climbing | $50 to $200 | Low | All mobility-impaired pets |
| Non-slip flooring | Prevents falls and sliding | $100 to $500 | Medium | Pets with balance issues |
| Orthopedic beds | Reduces joint pain | $60 to $300 | None | Arthritic or senior pets |
| Elevated feeders | Eases neck strain | $30 to $100 | None | Large breeds and senior dogs |
| Improved lighting | Compensates for vision loss | $20 to $150 | Low | Pets with declining eyesight |
Start with the modifications that address your pet’s most limiting challenge. A dog struggling with stairs benefits immediately from ramps, while one slipping on tile needs non-slip surfaces first. Combining multiple modifications creates a comprehensive support system that maximizes independence across all daily activities.
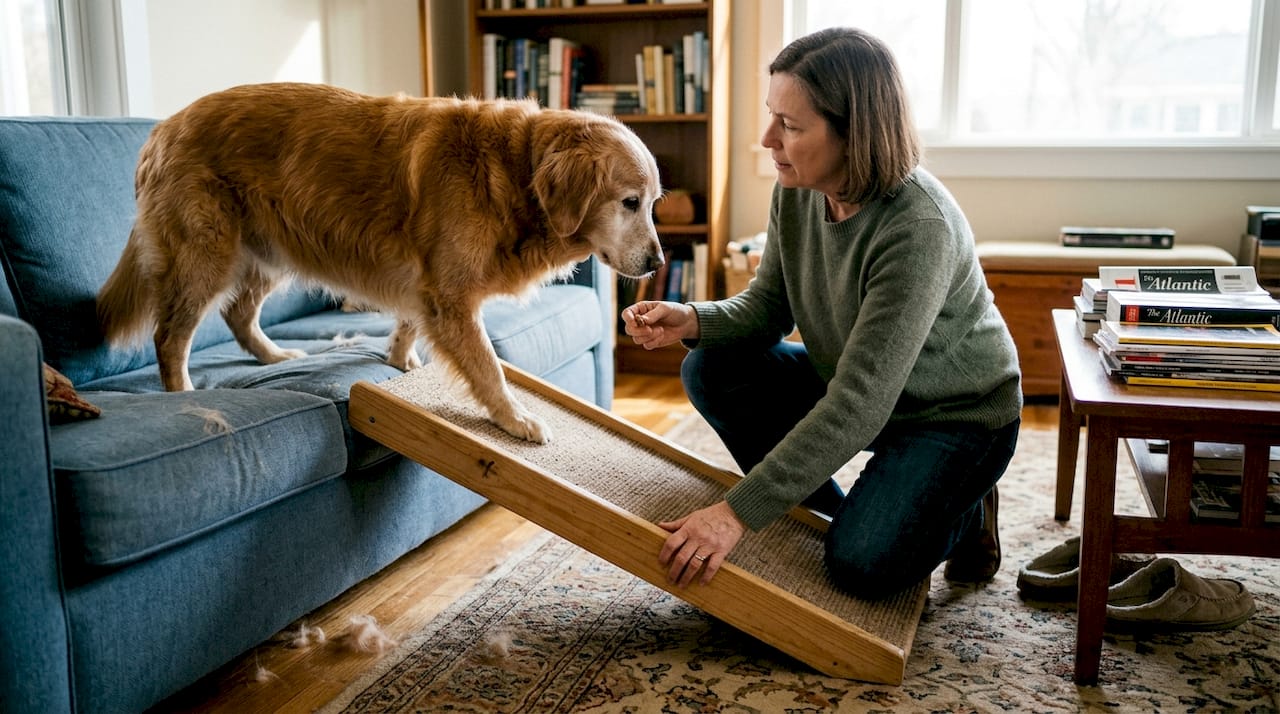
Senior pet safety extends beyond physical modifications to include routine adjustments. Move food, water, and bedding to the main floor if your pet struggles with stairs. Create multiple rest stations throughout your home so your dog can take breaks without traveling long distances.
Pro Tip: Test ramp angles before permanent installation by using a sturdy board at different inclines. Most dogs prefer ramps with a 1:4 ratio, one foot of rise for every four feet of length, as steeper angles strain joints and discourage use.
Having optimized communication and environment, the next tip focuses on training techniques that build your pet’s confidence and safe independent behaviors.
3. Train your dog for key independence skills and safe behaviors
Independence training equips service dogs and pets with skills that enable autonomous functioning while maintaining safety for both dog and handler. However, training does not uniformly increase self-control, and certain tasks like supporting handlers after falls can seriously injure dogs. Focus on context-specific skills that promote independent decision-making without physical risk.
Implement these safe independence training approaches:
- Teach alert behaviors such as signaling doorbells, phone rings, or timer alarms without handler prompting
- Train safe navigation skills like identifying obstacles and choosing accessible routes
- Develop context-appropriate responses where your dog assesses situations and acts independently
- Avoid tasks requiring the dog to bear handler weight or provide physical support during falls
- Build confidence through gradual exposure to new environments and decision-making opportunities
Service dog trainers must carefully evaluate which tasks promote independence versus which create dependency or danger. A dog trained to retrieve dropped items fosters handler autonomy. A dog trained to help someone stand after falling risks spinal injury and joint damage. The distinction matters enormously for long-term welfare.
Break complex skills into small, achievable steps. If teaching your dog to alert you to a specific sound, start by rewarding any attention to that sound, then shape the behavior toward your preferred alert method. Most dogs need 20 to 50 repetitions before reliably performing a new independence skill in varied contexts.
Dog training for independence skills should prioritize the dog’s physical and emotional wellbeing alongside the handler’s needs. Regular veterinary checkups ensure your dog remains physically capable of trained tasks. Behavioral assessments confirm your dog finds the work rewarding rather than stressful.
Now that foundational training principles are clear, let’s compare popular communication tools and home modifications side by side to inform your solution selection.
Comparison of popular communication tools and home modifications for pet independence
Choosing between communication aids and environmental modifications requires understanding how each option aligns with your pet’s specific needs, your caregiving capacity, and your living situation. Service dogs improve quality of life but also increase caregiver burden, making solution efficiency critical for sustainable independence.
| Solution Type | Training Time | Cost Range | User-Friendliness | Best Application | Limitations |
|---|---|---|---|---|---|
| Communication buttons | 2 to 6 weeks | $30 to $100 | High | All dogs capable of learning | Requires consistent placement |
| Verbal cues and signals | 1 to 4 weeks | Free | Medium | Dogs with good hearing | Handler must initiate |
| Ramps and steps | None | $50 to $300 | High | Mobility-impaired pets | Requires floor space |
| Orthopedic beds | None | $60 to $300 | High | Arthritic or senior dogs | Does not improve mobility |
| Non-slip flooring | None | $100 to $500 | High | Balance-impaired pets | Installation effort |
Communication tools excel when your primary goal is enabling your dog to initiate interactions and express needs independently. Environmental modifications work best when physical limitations prevent safe navigation or cause pain during routine activities. Most pet owners benefit from combining both approaches for comprehensive independence support.
Consider your dog’s learning style and physical capabilities when selecting solutions. A highly food-motivated dog masters button communication quickly. A dog with severe arthritis gains more immediate benefit from ramps and supportive bedding. Your own physical and time constraints also matter. Installing a ramp requires one-time effort, while button training demands daily practice for weeks.
The boosting service dog independence guide offers detailed frameworks for matching solutions to specific handler and dog profiles. Handlers with limited mobility prioritize communication systems that reduce the need for physical interaction. Owners of aging family pets emphasize environmental modifications that extend comfortable mobility.
With this comparison framework, let’s conclude with situational recommendations tailored to common pet owner scenarios.
Situational recommendations for pet owner independence and communication solutions
Applying these independence tips effectively requires tailoring strategies to your specific circumstances, pet type, and caregiving situation. Caregiver burden and training nuances significantly influence which solutions provide sustainable long-term benefits versus short-term improvements that increase stress.
Follow these situational guidelines:
- For elderly family pets, prioritize environmental modifications like ramps and orthopedic beds over intensive training programs that may frustrate aging dogs
- For service dog handlers with mobility challenges, implement communication button systems that reduce physical interaction requirements and enable dog-initiated alerts
- For active adult dogs, focus on independence skills training that builds confidence and decision-making abilities before physical decline begins
- For rescue dogs or those with anxiety, introduce independence tools gradually while maintaining security and routine to avoid overwhelming sensitive animals
- For multi-pet households, customize solutions per animal rather than applying identical strategies, as age and ability differences require individualized approaches
Balance is essential. Enhancing your pet’s independence should reduce your caregiving burden, not increase it. If a solution demands more time and energy than it saves, reconsider whether it fits your current capacity. Seek support from trainers, veterinarians, or independent living resources when implementing complex modifications.
Prioritize solutions with objective certification and welfare validation. Products and training methods backed by veterinary research or certified animal behavior professionals offer greater safety and effectiveness than unproven approaches. Your pet’s long-term health depends on evidence-based decisions.
Having covered expert-backed independence strategies, let’s explore how iPupPee’s tools can support your pet’s communication journey.
Discover iPupPee solutions to boost your pet’s independence
Transforming your pet’s independence starts with the right tools and expert guidance. iPupPee offers innovative communication button systems designed specifically for service dogs, senior pets, and animals requiring enhanced interaction capabilities. Our platform combines proven products with comprehensive training resources that help you implement communication solutions effectively from day one.
Whether you’re supporting an aging companion or training a service dog, iPupPee’s educational content covers everything from button placement to advanced independence skills. Our senior pet safety guides complement physical products with actionable strategies for home modifications and routine adjustments.
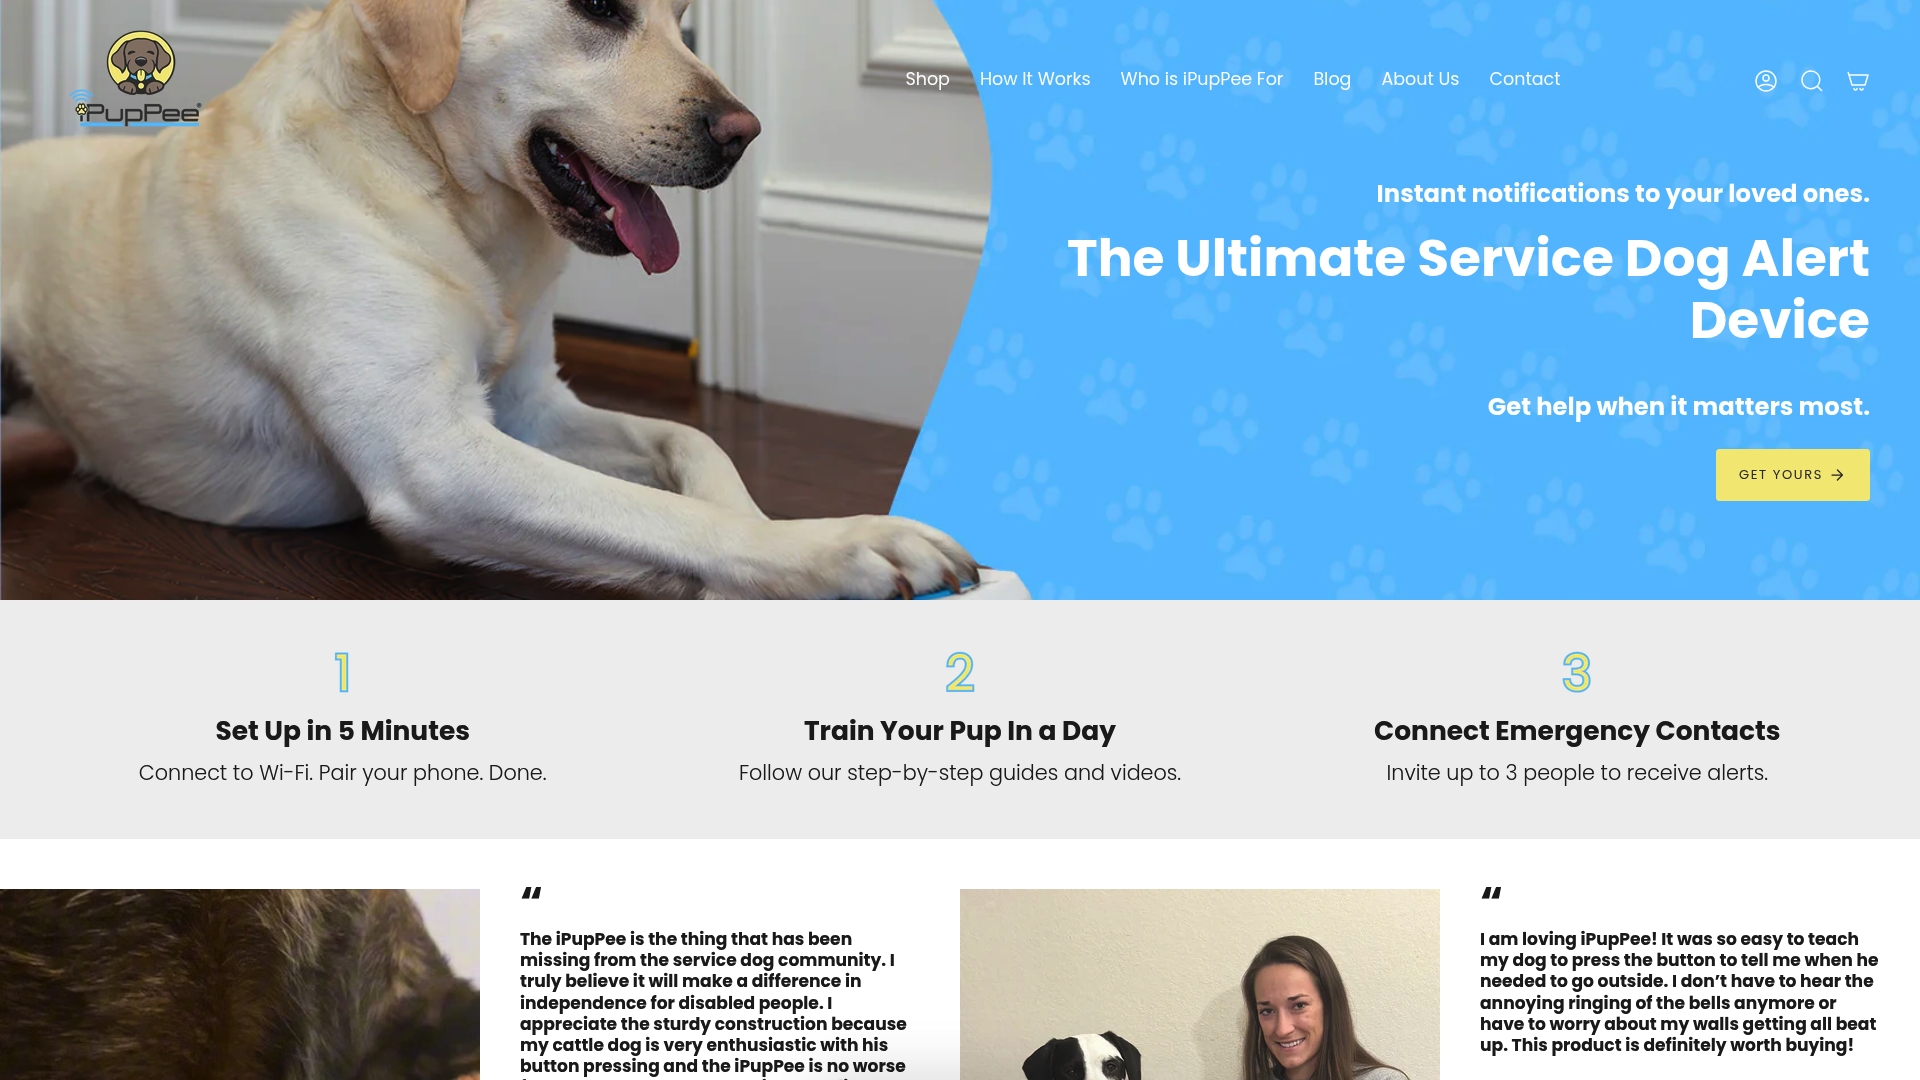
Pro Tip: Start with a single-button system for your dog’s most frequent need, typically water or bathroom access, before expanding to multiple buttons. This gradual approach builds confidence and prevents confusion during initial training.
To wrap up, let’s answer frequently asked questions about pet independence and communication.
What are the best ways to teach my dog to use communication buttons?
Start by placing buttons in consistent, accessible locations where your dog naturally goes for specific needs. Use positive reinforcement immediately after any interaction with the button, even accidental presses, to build association. Model the behavior yourself by pressing the button while saying the corresponding word, then immediately providing the item or action. Most dogs learn their first button within two to three weeks of daily practice. For detailed training protocols, review our dog button communication guide.
How can I modify my home to help my aging dog move safely and independently?
Install ramps at all stairs and furniture access points to eliminate jumping, which stresses arthritic joints. Add non-slip mats or textured flooring in high-traffic areas to prevent slipping and falls. Provide orthopedic beds that cushion pressure points and support proper spine alignment. Begin these modifications around age seven for large breeds, as arthritis affects 80% of dogs over eight years old. Our senior pet safety resources offer room-by-room modification checklists.
Are there risks to training service dogs for physical support tasks like helping after falls?
Yes, tasks requiring dogs to bear handler weight or provide physical support during falls can cause serious spinal injuries, joint damage, and long-term mobility problems for the dog. Focus instead on safe, context-specific training like alerting others, retrieving phones, or activating emergency systems. Training should enhance both handler and dog wellbeing without compromising the dog’s physical health. Explore safe alternatives in our dog training for independence skills guide.
How can I balance increasing my pet’s independence with managing my caregiver stress?
Select solutions that match your available time, physical capacity, and living situation rather than implementing every possible strategy. Start with modifications requiring minimal ongoing effort, like installing ramps or non-slip flooring, before committing to training programs demanding daily practice. Seek support from professional trainers or veterinary behaviorists to share the workload and ensure effective implementation. Our boosting service dog independence guide includes caregiver wellbeing assessments to help you choose sustainable approaches.
Recommended
- 7 Essential Communication Tips for Dog Owners – iPupPee
- 7 Essential Communication Tips for Disabled Pet Owners – iPupPee
- 7 Essential Dog Training Communication Tips for Owners – iPupPee
- 7 Essential Dog Independence Tips for Service Dog Owners – iPupPee
- 7 Essential HVAC Tips for Pet Owners in Every Home - HVAC Service and Repair | Louisville, KY | Project Heating & Cooling
- 7 Common Pet Health Supplements Every Owner Needs | Mybestpharmacy.net | Online Pharmacy