

Yes, a rescue dog or a newly adopted dog can reliably learn one or two communication buttons fairly quickly, and a workable vocabulary of a few buttons within a couple of months, provided the shelter or adopter models the button and responds every single time it’s pressed. This isn’t a training gimmick that needs months of patience before you see a result. It’s closer to teaching a doorbell: the dog needs to see cause and effect a handful of times before the association clicks.
Here’s what that timeline actually looks like on the ground.
- A few initial days: The dog investigates the button, may bump it by accident, and starts noticing that a press produces a consistent outcome.
- By the end of the first week: One or two words become reliable in a single, quiet location.
- Within several weeks after that: Additional words get introduced; the dog starts discriminating between them instead of pressing at random.
- Over the course of a couple of months: The dog generalizes the skill across rooms, people, and situations, and may start stringing presses together.
That progression tracks with guidance from the American Kennel Club on soundboard-trained dogs, which provides expert guidance on such training. iPupPee, as a device category, was built around this exact adoption curve: durable buttons, recordable voice, and mat-based placement designed for a shelter’s turnover pace, not a months-long training lab.
Pro Tip: Track presses in a simple notebook for the first two weeks. A dog that presses “outside” three times a day by day 10 is ahead of schedule; one that hasn’t pressed anything by day 5 usually just needs a more consistent location, not more time.
Key Takeaways
Rescue and newly adopted dogs can learn a communication button within days and build a small reliable vocabulary within four to eight weeks when handlers model consistently and respond to every press.
| Point | Details |
|---|---|
| Model before expecting presses | Press the button yourself, say the word, follow through immediately, several times per session. |
| Respond every single time | Consistency in response is what teaches meaning, not the number of repetitions. |
| Use life rewards, not treats | Save food for early shaping only; let the real outcome be the reinforcer. |
| Fix the button’s location | Never relocate it once training starts; spatial memory drives reliability. |
| Track presses and follow up | Log context and check in at 3 days, 2 weeks, several weeks, and a couple of months. |
| iPupPee supports the whole process | Recordable, mat-mounted buttons and printable training guides match this protocol step for step. |
Table of Contents
- Pre-Handover Checklist for Shelters and Volunteers
- Quick-Start Protocol for the First Three Sessions
- Progressive Training Schedule for Weeks 1 Through 8
- Reward Strategy: What to Use and What to Avoid
- Safety, Mounting, and Placement Best Practices
- Reading a Dog’s Body Language Alongside the Button
- Troubleshooting Stalled Progress and Unwanted Presses
- Adopter Handover: Script and Materials to Send Home
- Measuring Success and Planning Follow-Up Check-Ins
- Where This Guidance Comes From
- Frequently Asked Questions
- Sources
Pre-Handover Checklist for Shelters and Volunteers
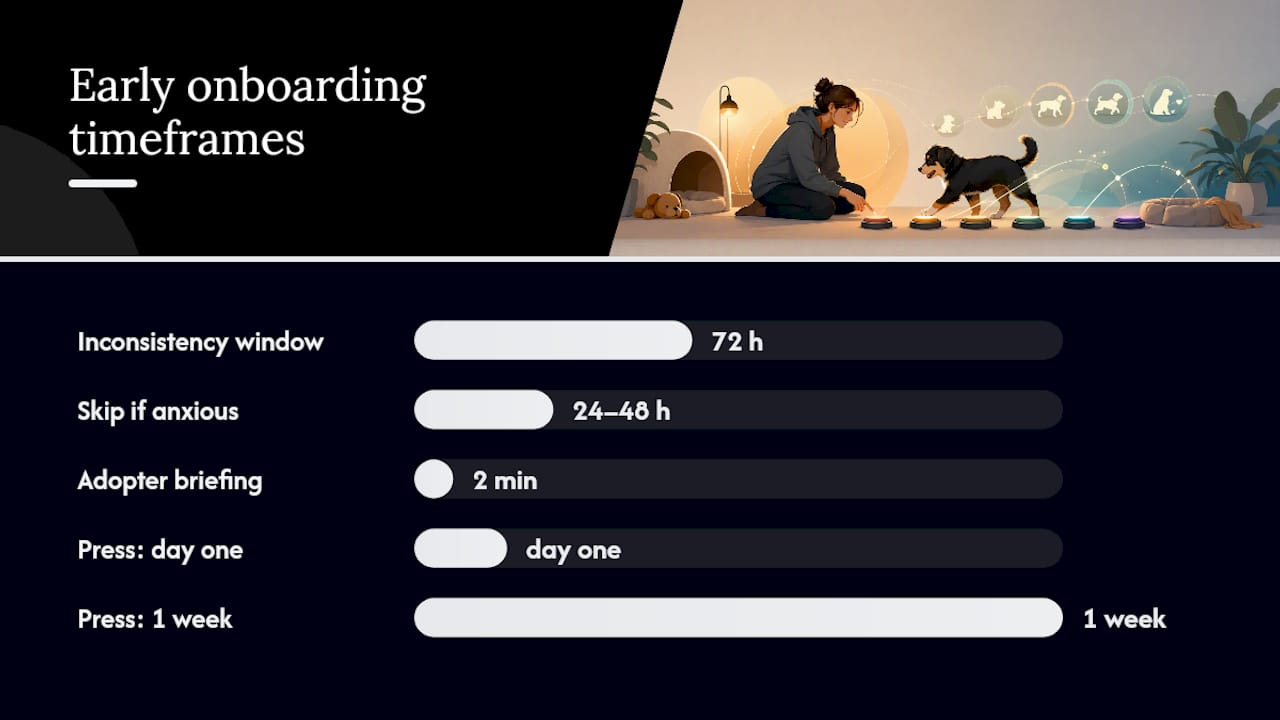
Getting a dog to a reliable first press starts before the adopter ever walks in the door. Shelters that build a short prep routine into every adoption avoid the single biggest cause of stalled training: inconsistency in the first 72 hours.
Device prep:
- Charge the device fully and test both buttons before the meet-and-greet.
- Record the words in the voice of whoever will be primary trainer, staff or adopter, since dogs key into vocal tone as much as the word itself.
- Pick one or two words tied to routine events the dog already experiences daily, like “outside” or “play.”
Environment prep:
- Choose one consistent spot, ideally near a mat, and commit to never moving it once training starts.
- Clear the area of cords, small chew hazards, and anything a stressed dog might tangle in.
- Pick a low-traffic corner so early sessions aren’t competing with kennel noise or foot traffic.
Adopter prep:
- Give a two-minute verbal briefing on what to expect in week one.
- Hand over a printed one-page checklist covering setup, first responses, and a support contact.
- Set expectations honestly: some dogs press on day one, others take a week, and both are normal.
| Point | Details |
|---|---|
| Charge and label the device | Test both buttons and record words before the adopter arrives. |
| Fix the location early | Choose one spot near a mat and never relocate it during training. |
| Send adopters home prepared | Include a printed checklist so training continues the same way at home. |
Pro Tip: Print the handout on one side of a single page. Adopters leaving with a stressed, excited new dog rarely read more than that.
What if the dog seems too anxious for training in the first days? Skip button sessions entirely for the first 24 to 48 hours. A dog still decompressing from a shelter environment needs quiet and routine before it needs vocabulary. Resources on dog communication barriers cover how stress signals can be mistaken for disinterest.
Quick-Start Protocol for the First Three Sessions
The first sessions set the tone for everything after, and they’re shorter than most people expect. Five to ten minutes, two or three times a day, beats one long twenty-minute session every time.
- Sit near the button with the dog nearby, not restrained.
- Press the button yourself, say the word aloud immediately after, and follow through with the real action within a few seconds (open the door, bring out the toy).
- Repeat this modeling four or five times per session without asking the dog to do anything.
- When the dog sniffs, paws, or bumps the button on its own, even by accident, respond exactly as if it were intentional.
- Say the word again as you follow through, reinforcing the link between press, sound, and outcome.
Dogs learn buttons by connecting three things: where the button sits, the sound it produces, and what happens right after, according to Camp Bow Wow’s guidance on talking buttons. That’s why the follow-through step can’t be skipped or delayed, even by thirty seconds. Delay breaks the chain the dog is building in its head.
Resist the urge to reward every touch with a treat. Early sessions are about targeting and shaping, guiding the dog’s nose or paw toward the button through gentle encouragement, not stuffing food into every interaction. A dog that learns “press equals treat” instead of “press equals outside” has learned the wrong lesson.
Pro Tip: If the dog seems bored or overwhelmed mid-session, end early. A short session that ends on interest beats a long one that ends on avoidance.
Progressive Training Schedule for Weeks 1 Through 8
Vocabulary should expand only as fast as reliability allows, not on a fixed calendar. That said, a general schedule helps shelters and adopters know what “on track” looks like.
| Week | Objective | Responder action | Success criteria |
|---|---|---|---|
| 1–2 | Single-word reliability | Respond to every press immediately | 2 to 3 intentional presses per day |
| 3–4 | Introduce a second word | Keep buttons spatially separate | Dog presses correct button for context reliably |
| 5 | Add a third word | Reinforce discrimination, not speed | Fewer accidental or random presses |
| 8 | Generalize across rooms/people | Every household member responds the same way | Dog presses reliably with a new person present |
Introducing one button at a time and pairing the press directly with its outcome is the sequence recommended by Adopt a Pet’s guide to communication buttons. Rushing a third or fourth word before the first two are solid usually backfires into random pressing rather than intentional communication.
- Watch for a drop in accidental presses as the strongest sign of real learning.
- Track context, not just count. A dog pressing “outside” only near the door is learning faster than one pressing anywhere.
- Expect a plateau around week 3. That’s normal, not a failure.
Pro Tip: Log presses on a shared sheet if multiple staff members handle the dog. Inconsistent tracking hides real progress.
| Point | Details |
|---|---|
| Reliability before expansion | Add a new word only after the current one gets used with intent, not chance. |
| Watch context, not volume | A dog pressing near the right situation is ahead of one pressing constantly. |
Reward Strategy: What to Use and What to Avoid
The strongest reinforcer for a button press isn’t a treat, it’s the actual outcome the word describes. A dog that presses “outside” and gets to go outside has just received the most meaningful reward possible. Save food for the earliest shaping steps only, and phase it out fast.
Feeding a treat after every press risks teaching the dog to associate the button with snack delivery rather than the intended message, a caution raised directly by the American Kennel Club’s expert guidance on soundboard training. Once that association forms, it’s genuinely hard to unwind, and you end up with a dog pressing “play” purely to get a cookie.
Do not do this:
- Don’t force the dog’s paw onto the button. Let curiosity drive the first touches.
- Don’t reward inconsistent or random presses as if they were intentional.
- Don’t move the button’s location once training has started.
- Don’t punish a wrong-context press. Redirect instead.
A dog pressing a button for a treat has learned a trick. A dog pressing a button to get let outside has learned to communicate.
Pro Tip: Transition from treats to life rewards by week two at the latest. Praise and the real-world outcome should carry the weight by then, not food.
Safety, Mounting, and Placement Best Practices
Where a button lives matters as much as how it’s trained. Buttons work through spatial memory as much as sound, so placement decisions made in week one often determine reliability in week eight.
Keep the button in one fixed location, ideally near where the related action happens, like a potty button by the exit door. Dogster’s training guide is direct on this point: buttons that move lose their spatial anchor, and dogs that were pressing reliably can regress once relocated.
- Mount on a non-slip mat so the board doesn’t slide during an enthusiastic paw press.
- Secure any cords or wiring well out of chewing range.
- Mount at a height the specific dog can reach without straining or jumping.
- For outdoor kennel areas, use weather-protected housing or bring the unit indoors overnight.
Shelter staff photographing the setup for adopter handovers should capture the button’s exact position relative to the door or activity area, plus a close-up of the mounting and cable routing. Those two images do more to prevent at-home placement mistakes than a paragraph of instructions.
Roughly one in three early training stalls traces back to a moved or unstable button rather than a disinterested dog, based on the pattern Dogster and Camp Bow Wow both flag in their placement guidance. Fixing the mount is often faster than “starting over” with the dog.
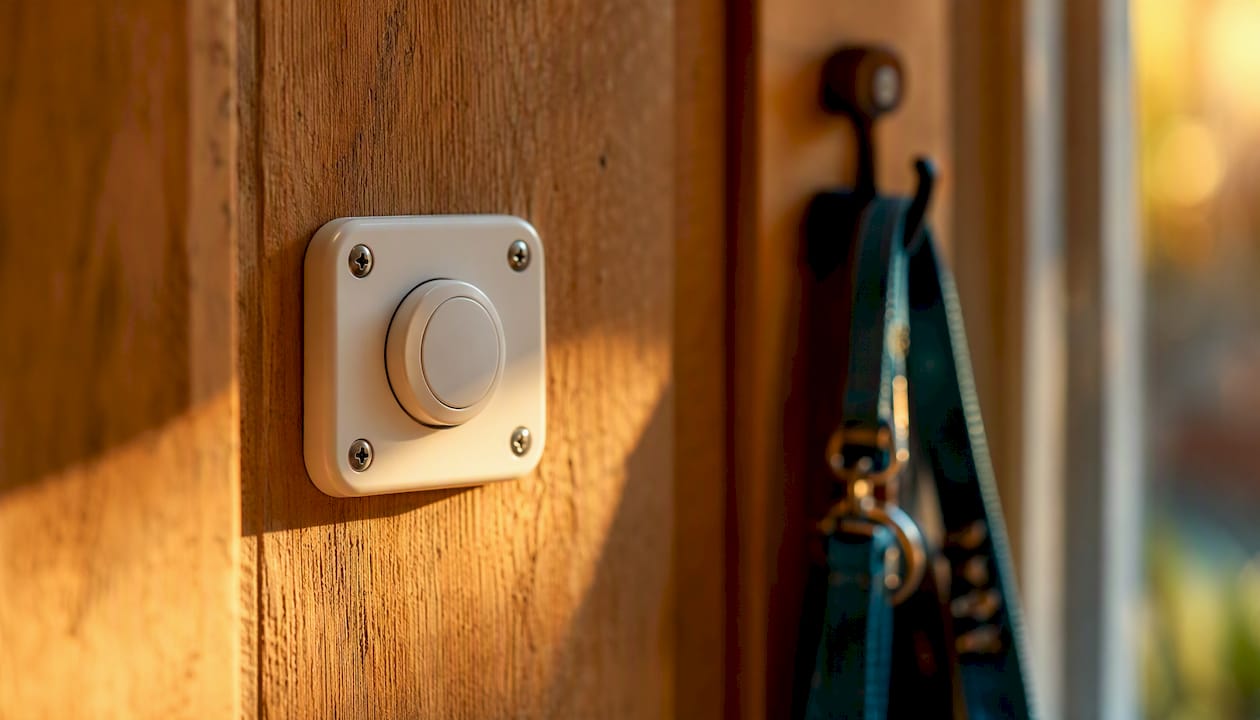
Pro Tip: Take the adopter’s placement photo before they leave the shelter, not after. It’s the single easiest thing to forget in a rushed pickup.
Reading a Dog’s Body Language Alongside the Button
A pressed button never tells the whole story. Before responding, glance at the dog: tail carriage, ear position, whether it’s frozen or loose, whether it’s making eye contact or avoiding it. A press made while the dog is stiff and staring at the door usually means something different than a relaxed press made mid-play.
- Spend two minutes daily just observing the dog at rest to establish a calm-state baseline.
- Note what a stressed posture looks like specifically for that dog before training sessions begin.
- Before every response to a press, do a quick body scan: is this excitement, or is this anxiety?
- Log context alongside the press: time of day, activity, and what the body language showed.
This matters because a button can accidentally reward anxiety if you respond identically to an anxious press and a calm one. Guides on decoding dog body language are worth reviewing alongside button training, since the two skills reinforce each other rather than compete.
- Never treat the button as the only communication channel. A dog’s ears and tail are talking constantly, with or without a device.
- If a press consistently coincides with visible stress signals, address the anxiety first, not the vocabulary.
Pro Tip: Keep the observation log on the same page as the press log. Patterns jump out fast when context and behavior sit side by side.
Troubleshooting Stalled Progress and Unwanted Presses
Every shelter runs into the same handful of snags. Knowing the fix in advance saves weeks of frustration.
- No interest in the button: Check placement first. Move it closer to a high-value routine event, and increase modeling frequency for a few days.
- Accidental or constant pressing: Reduce how often you respond to low-effort presses; only reinforce presses that look intentional.
- Attention-seeking overuse: Briefly pause responses for a session or two, then resume with stricter consistency.
- Wrong-context presses: Don’t punish. Redirect to the correct button and re-model that word.
- Anxiety-driven presses: Address the underlying stress with calm-down routines before continuing training.
Run the decision flow in order: check placement, then check whether responses have been consistent, then look at whether reinforcement has crept up in ways that reward the wrong thing, then re-model from scratch if needed. That sequence mirrors the troubleshooting logic in Adopt a Pet’s training breakdown.
When presses become frequent or inappropriate, check placement, response consistency, and unintended reinforcement before assuming the dog has failed to learn.
Pro Tip: If a dog shows no press interest after two full weeks of consistent modeling, or if pressing seems tied to distress rather than communication, loop in a certified trainer. Document what’s been tried so the trainer isn’t starting blind.
| Point | Details |
|---|---|
| Diagnose before retraining | Check placement and response consistency before assuming the dog isn’t learning. |
| Anxiety needs a different fix | Calm the underlying stress first; don’t just keep modeling the button. |
Adopter Handover: Script and Materials to Send Home
The pickup moment is chaotic, so the handover script should be short enough to say in under a minute.
- “This is the button your dog has started learning. Here’s what it means and how it’s gone so far.”
- “Keep it in this exact spot, and respond every single time, even if it seems accidental at first.”
- “Progress varies a lot dog to dog. Some pick up a second word in a week, others take a month, and both are completely normal.”
Avoid promising a specific timeline. Overpromising sets adopters up to feel like something’s wrong when their dog moves at its own pace.
One-page handout should include:
-
Device setup and charging instructions.
-
The exact words recorded and what each one means.
-
A first-week checklist mirroring the shelter’s own routine.
-
Quick troubleshooting fixes for the top three problems above.
-
A phone number or email for follow-up questions.
-
Give adopters a simple log template: date, button pressed, context, and what happened next.
-
Ask them to bring or send that log to the 2-week check-in.
| Point | Details |
|---|---|
| Keep the script short | Three sentences at pickup covers setup, consistency, and realistic expectations. |
| Send a log template | Adopters tracking presses and context give shelters real follow-up data. |
Pro Tip: Include the shelter’s own rescue-specific communication resources in the handout. Adopters read more when it looks tailored to a rescue dog specifically, not a generic puppy guide.
Measuring Success and Planning Follow-Up Check-Ins
Success isn’t vague. It shows up in a few countable numbers: presses per day, the percentage that happen in the right context, and how many days passed before the first reliably intentional press.
| Checkpoint | Timing | Data to collect |
|---|---|---|
| Initial check-in | 3 days post-adoption | Any press activity, dog’s stress level |
| Progress check | 2 weeks | Presses per day, context accuracy |
| Vocabulary check | several weeks | Number of reliable words, generalization across people |
| Final review | a couple of months | Overall communication reliability, any lingering issues |
- Ask adopters for a rough count, not a perfect log. “About twice a day, mostly by the door” is useful data.
- Track aggregate numbers across adopted dogs to spot which words or placements consistently work best.
- Flag any dog with zero presses by the two-week mark for a closer look rather than assuming it will resolve itself.
Pro Tip: A shared spreadsheet across adopted dogs, even a rough one, turns anecdotal shelter experience into a pattern you can actually teach new volunteers from.
Where This Guidance Comes From
This protocol synthesizes published training guidance from the American Kennel Club, Camp Bow Wow, Adopt a Pet, and Dogster, combined with practitioner patterns seen across shelter pilot programs using recordable button devices. The step sequences, timing windows, and troubleshooting flow reflect a consensus across those sources rather than a single study.
- What’s evidence-based: the mechanics of association (location, sound, outcome), the caution against treats as primary reward, and the value of consistent response timing.
- What’s practitioner-driven: the specific week-by-week schedule, session lengths, and shelter checklist items, refined through repeated real-world use rather than controlled studies.
- Where gaps remain: long-term vocabulary ceilings and cross-dog variability in learning speed still lack large-scale published data.
Guides on creating dog communication signals and teaching dogs communication expand on several of the mechanics referenced here for readers who want to go deeper on vocabulary design.
Why predictability matters more than speed
I’ve watched enough shelter intake stories to notice a pattern: the dogs that struggle most in a new home aren’t the untrained ones, they’re the ones facing a world with no predictable rules. A button gives an anxious rescue dog one small, dependable lever. Press it, something specific happens. That’s valuable for a dog whose last few weeks may have involved constant unpredictability.
One case that stuck with me involved a shelter dog who wouldn’t settle during meet-and-greets until staff modeled a single “outside” button consistently for four days. By day six, the dog was pressing it on its own, and adopters reported it had become the calmest part of an otherwise stressful transition. That’s the real value here, not a party trick, a small piece of structure in a dog’s first unstable weeks.
If you’re implementing this at your shelter and run into something this guide doesn’t cover, reach out. Field notes from real intake situations are how this kind of guidance actually improves.
How iPupPee fits into this exact protocol
Every checklist in this guide, mounting, recordable words, consistent placement, maps directly onto how iPupPee devices are built. The buttons use a stable mat base so they don’t slide during an eager first press, and the recordable voice feature lets shelter staff or adopters record words in a familiar voice from day one, which matters more than people expect for a nervous rescue dog.
For shelters juggling multiple adoptions a week, having a device that survives repeated handling and travels well from kennel to new home cuts down on the setup friction that derails week one. iPupPee’s training guides also give adopters a printable reference that mirrors the handover checklist in this article, so the transition from shelter routine to home routine doesn’t require adopters to remember everything from a five-minute pickup conversation. If you’re prepping a batch of dogs for adoption day, visit the iPupPee device and training resources to see current setups and get the handout materials ready before your next intake.
Frequently Asked Questions
How long does it take a rescue dog to learn its first button? Most dogs show intentional pressing within the first week when the button is modeled consistently and placed near a routine daily event.
Should I use treats to train a communication button? Only sparingly, for early shaping. The American Kennel Club advises against food as the primary reward since it can teach the wrong association.
Can the button replace understanding my dog’s body language? No. Buttons work best alongside body language, not instead of it. Always check the dog’s posture before responding to a press.
What if my newly adopted dog shows no interest in the button at all? Check the button’s placement and increase modeling frequency for a few days before assuming the dog isn’t ready. Some rescue dogs need a decompression period first.
How many words should a dog learn in the first two months? Four to six reliable words by week eight is a realistic target for most dogs when training stays consistent and vocabulary expands gradually.
Sources
- Can Dogs Talk With Buttons? Using Soundboards to Communicate
- Dog Talking Buttons: What They Are and How They Work | Camp Bow Wow®
- How to Use Dog Communication Buttons During Dog Training
- How to Teach Your Dog to Talk With Buttons: 7 Training Tips — Dogster