

Start by documenting a prioritized safety program built on four pillars: a written safety manual, a hazard assessment, staff training, and an emergency action plan. Pick the single highest-risk issue in your facility today, whether that’s dog-fight prevention or chemical storage, assign one person to own it, and get a draft policy on paper before the week ends. Success in the first month looks like this: a written policy, a named owner, and one documented training session on the books.
TL;DR:
- Most rescue shelters fail to implement a complete safety program because they try to build all components at once instead of prioritizing the highest risks first.
- Conducting a hazard assessment involves visual walkthroughs, task breakdowns, staff input, hazard scoring, and turning high-scoring hazards into specific action items.
- An effective safety manual should be accessible, regularly reviewed, and contain core protocols, emergency contacts, and checklists, not just static documents.
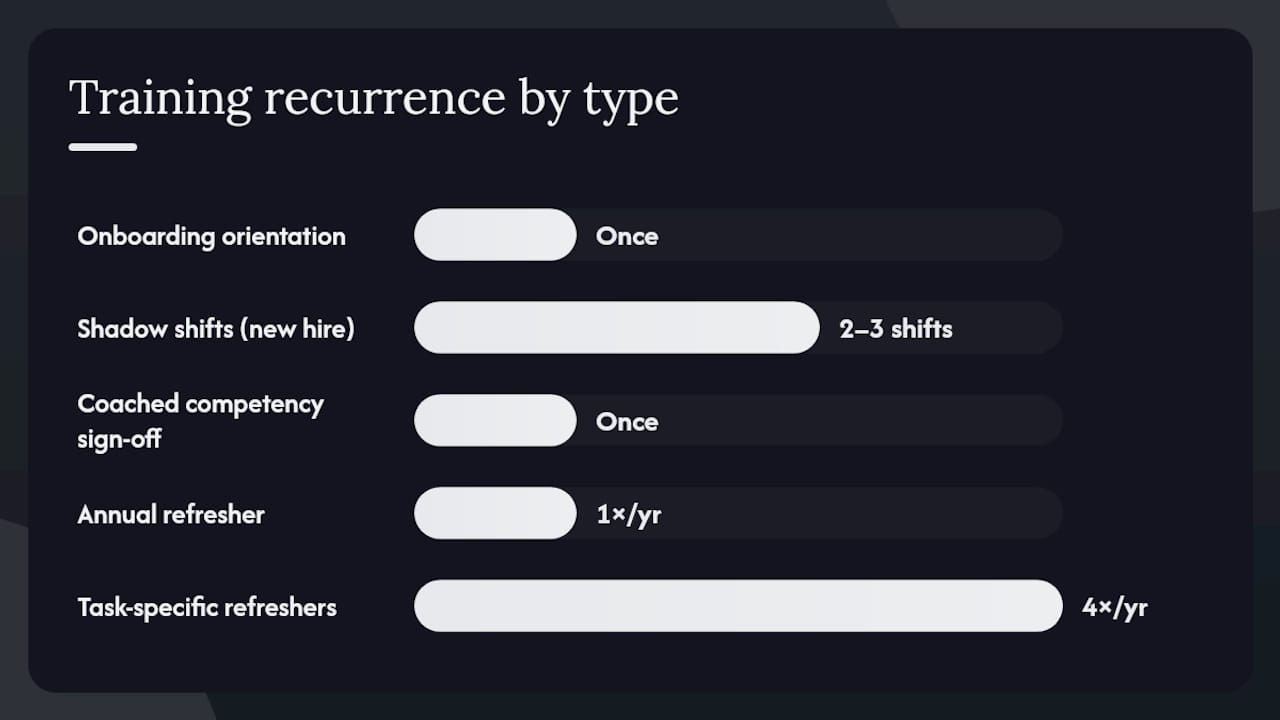
- Staff training must be ongoing, including onboarding, shadow shifts, competency sign-offs, annual refreshers, and emergency drills to maintain familiarity and safety compliance.
- Implementing direct-alert communication devices can significantly improve response times during emergencies, especially when integrated into regular drills and staff routines.
Table of Contents
- Implementing Safety Protocols for Rescue Facilities: The Core Components
- How Do You Conduct a Hazard Assessment in a Shelter?
- Building a Written Safety Manual That Staff Actually Use
- Staff Training and Competency Documentation
- Choosing the Right Mix of Engineering Controls, Procedures, and PPE
- Building an Emergency Action Plan That Survives a Real Emergency
- Disease Control, Quarantine, and Biosecurity Protocols
- Humane Handling and Restraint: Reducing Injury on Both Ends of the Leash
- How Often Should You Inspect and Maintain Your Facility?
- Turning Incidents Into Improvements: Reporting and Root-Cause Analysis
- Implementation Aids and Emergency Communication Templates
- What Rollout Priorities Actually Move the Needle
- How Ipuppee Supports Emergency Communication and Drills
- Where to Verify the Details
- Sources
- FAQ
Implementing Safety Protocols for Rescue Facilities: The Core Components
A rescue facility’s safety program isn’t one document. It’s a set of interlocking pieces that reference each other, and trying to build all of them at once is why most shelters never finish the job. Break it into parts, assign an owner to each, and roll them out in order of risk.
The essential components:
- Written safety manual covering emergency contacts, hazardous materials, PPE policy, and standard operating procedures
- Hazard assessment that ranks risks by likelihood and severity
- Staff and volunteer training with documented competency sign-offs
- Emergency action plan (EAP) with evacuation routes and a designated coordinator
- PPE and engineering controls matched to specific tasks
- Biosecurity and quarantine protocols to prevent disease spread
- Humane handling and restraint procedures
- Facility inspection and maintenance logs
- Incident and near-miss reporting system
Assign a program owner (usually the shelter director or operations manager), a safety coordinator who handles day-to-day compliance, departmental leads for medical, behavior, and intake, and volunteer leads who translate policy into floor-level habits. The Guidelines for Standards of Care in Animal Shelters from the Association of Shelter Veterinarians calls for documented policies and routine training as a baseline, not an aspiration.
Roll out incrementally. If your intake area has no separation protocol between unknown-history dogs, fix that before you rewrite your cleaning schedule. One well-enforced policy beats five ignored ones.
How Do You Conduct a Hazard Assessment in a Shelter?
A hazard assessment is a structured walkthrough that turns “we should probably fix that” into a ranked, actionable list. It’s the step most facilities skip, and it’s the reason the same injuries keep happening year after year.
- Walk every space with fresh eyes. Cover intake, kennels, isolation, medical, the food prep area, the parking lot, and volunteer break rooms. Note anything that could injure a person or an animal.
- Break down tasks, not just locations. Restraining a fearful dog for a nail trim carries different risks than mopping a kennel run. List hazards by task, not just by room.
- Ask the staff who actually do the work. Front-line kennel techs and vet assistants spot hazards managers miss because they’re the ones reaching into crates and handling syringes daily.
- Score each hazard. Use a simple matrix: likelihood (rare, occasional, frequent) times severity (minor, serious, catastrophic). A frequent, minor hazard, like slipping on wet floors, might score similarly to a rare but catastrophic one, like an unsecured propane tank near the generator.
- Convert every high score into an action. Each hazard needs exactly one of: a new policy, an engineering fix, a procedural change, added PPE, or a training module.
Pro Tip: Don’t let your hazard list live in a spreadsheet nobody opens. Pin the top five risks to the staff bulletin board and revisit them at every monthly meeting until each one is closed out.
The Management of Animal Care and Use Programs occupational safety chapter frames this scoring approach as the foundation for choosing between engineering and procedural fixes, a distinction that matters more than most managers realize once you get to solutions.
Building a Written Safety Manual That Staff Actually Use
A safety manual that sits in a binder on a top shelf isn’t a safety manual, it’s a liability document nobody reads until something goes wrong. ASV guidelines require documented, accessible protocols reviewed on a regular cadence, and “accessible” is doing a lot of work in that sentence.
Structure the manual so the front page carries only what changes often: emergency contacts, poison control, the nearest emergency vet, and your fire department’s non-emergency line. This single piece of advice, drawn from OSHA’s evacuation planning guidance, saves you from reprinting a 40-page manual every time a phone number changes.
Beyond the contact page, your manual needs:
- The emergency action plan and evacuation procedures
- Hazard communication documentation for cleaning chemicals and anesthetic gases
- PPE policy by task and department
- Handling and restraint SOPs
- Quarantine and isolation procedures
- Inspection and maintenance logs, or a reference to where they’re stored
Keep a printed copy at every workstation that might lose power or Wi-Fi during an emergency, and a searchable digital version for daily reference. Appendices work well for checklists staff fill out repeatedly, like daily kennel inspections, since they can be photocopied without touching the core document.
Set a review cadence, annually at minimum, and log every revision with a date and the reviewer’s initials. When an inspector or funder asks for proof of a functioning safety program, a version-controlled manual with a visible edit history says more than any verbal assurance.
Staff Training and Competency Documentation
Training that happens once during onboarding and never again is the single most common gap in rescue facility safety programs. Competency fades, staff turn over, and protocols drift without reinforcement.
- Onboarding orientation. Every new hire and volunteer reads the safety manual before their first shift, not sometime in their first month.
- Shadow shifts. Pair new staff with an experienced handler for at least two to three shifts before they work independently with animals.
- Coached competency sign-off. A supervisor observes the new person perform a task, restraint, medication administration, cleaning protocol, and signs a written form confirming competency.
- Annual refreshers. Revisit the full safety manual once a year, even for veteran staff. Protocols change, and memory doesn’t hold indefinitely.
- Task-specific refreshers. Medication handling, control pole use, and fight response deserve their own recurring sessions, ideally quarterly for high-turnover roles.
- EAP drills. Practice the emergency plan regularly with the whole team, not just leadership.
Pro Tip: Tie training records directly to task permissions. A volunteer shouldn’t be scheduled for large-dog handling until their sign-off sheet says they’ve completed that specific competency check, not just “orientation.”
Keep a training log for every staff member and volunteer: date, task, trainer, and outcome. This isn’t paperwork for its own sake. When ASV or a licensing inspector asks whether your team is trained on hazard communication or animal restraint, a dated, signed record answers the question instantly. Certificates of completion, even simple ones you generate in house, give staff a tangible marker of progress and give you an audit trail.
Choosing the Right Mix of Engineering Controls, Procedures, and PPE
The order matters more than most managers assume. Occupational safety guidance from NCBI’s chapter on animal care programs lays out a hierarchy: eliminate the hazard first, then engineer around it, then build a procedure, and only then rely on personal protective equipment. PPE sits at the bottom because it depends on a human remembering to use it correctly every single time.
Engineering examples that actually reduce injury:
- Double-compartment housing so a dog can be moved to one side while staff clean the other, eliminating direct contact during service
- Proper ventilation or scavenging systems in rooms where anesthetic gases are used, cutting staff exposure without relying on masks
- Backup generators and secondary water filtration so utility failures don’t force emergency workarounds under pressure
Procedural controls fill the gap engineering can’t close: a two-person rule for handling unknown-history dogs, or a mandatory cooldown period before reintroducing a reactive animal to group housing.
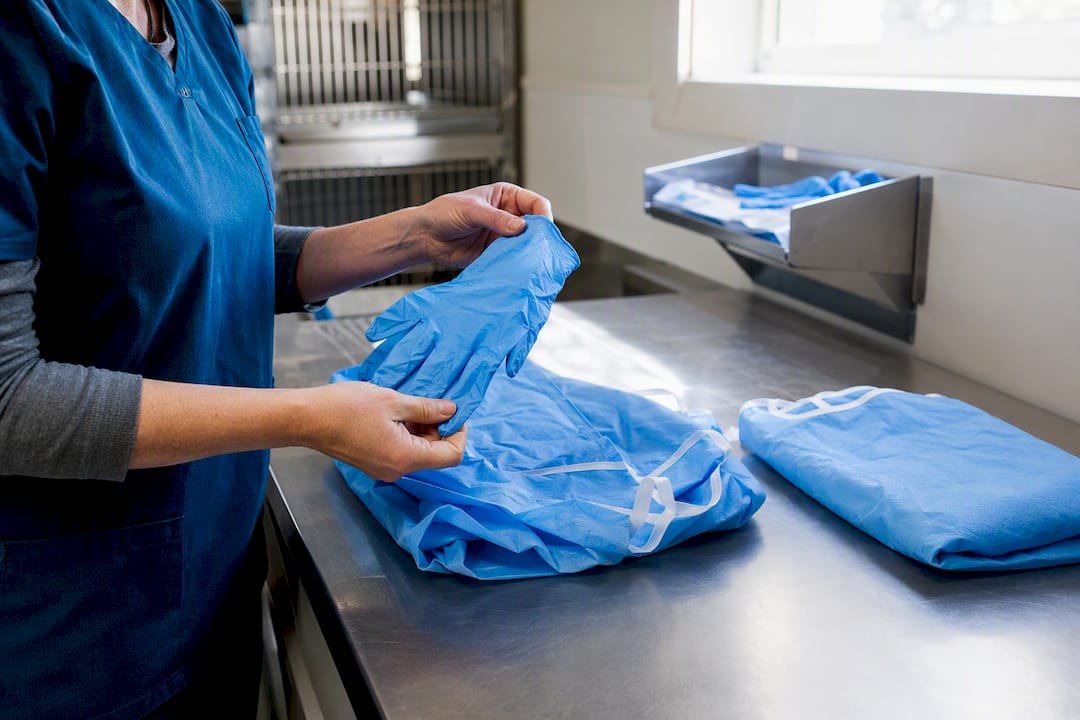
PPE still matters, but a program only works if it fits. Stock multiple glove and gown sizes, and keep latex-free alternatives on hand. Real-world adherence collapses fast when the only gloves available don’t fit the staff wearing them. Inspect PPE monthly for wear, and replace anything cracked, torn, or expired without waiting for someone to ask.
Building an Emergency Action Plan That Survives a Real Emergency
An emergency action plan that exists only as a PDF nobody has opened since it was written is worse than no plan at all, because it creates false confidence. OSHA’s guidance on evacuation plans is explicit: EAPs must be site-specific, name a coordinator, and get tested with trained personnel, not assumed to work because they’re written down.
Build the plan around these elements:
- Designate a coordinator and at least one backup, since emergencies don’t wait for the right person to be on shift.
- Define evacuation and shelter-in-place procedures separately, since a fire response looks nothing like a severe weather response.
- Set assembly points for staff, volunteers, and visitors, away from the building and clear of emergency vehicle access.
- List external agency contacts, fire, police, animal control, and your closest emergency veterinary hospital, on that standalone front page mentioned earlier.
- Assign emergency roles in advance: who grabs the animal transport carriers, who accounts for staff, who calls 911.
Contingency housing deserves its own line item, not an afterthought. According to Ready, coordinating with outside agencies before an emergency happens is what separates a functional plan from a theoretical one. Pre-arrange agreements with partner shelters, boarding facilities, or veterinary clinics that can take animals on short notice, and know your transport logistics (vehicles, crates, fuel) before you need them at 2 a.m.
Contingency housing arrangements matter for:
- Fire or structural damage displacing your entire population
- Extended power outages affecting climate control or medical equipment
- Disease outbreaks requiring facility-wide decontamination
Test the plan at least annually, and after every drill, document what broke down: the phone tree that stalled, the exit door that stuck, the carrier count that came up short. HSE’s guidance on incidents and emergencies stresses coordinating drills with outside responders when your facility hosts public events or has visitors on-site, since evacuation assistance for guests with disabilities needs its own documented procedure.
Disease Control, Quarantine, and Biosecurity Protocols
Intake is where most outbreaks start, and the fix begins before an animal ever reaches a kennel. Screen every incoming animal for visible illness, check vaccination history where available, and route anything with unknown status straight to isolation rather than general population, even when the intake line is backed up.
Quarantine facility design matters as much as the paperwork. Isolation spaces need separate ventilation from general housing where possible, dedicated cleaning supplies that never cross into other areas, and a monitoring schedule that catches symptom onset early. Coordinate vaccination and testing protocols directly with your veterinarian rather than improvising a schedule based on what a previous shelter did.
Cleaning and disinfection order matters more than most staff realize:
- Clean isolation and quarantine areas last, after general population kennels, never before
- Use dedicated tools, mops, buckets, gloves, for isolation zones and never let them touch other areas
- Follow manufacturer contact times for disinfectants; wiping and moving on too fast defeats the product
- Require dedicated PPE (gowns, boot covers) for anyone entering isolation, removed before leaving
The Code of Practice for Animal Welfare Establishments ties quarantine facility standards directly to broader health and safety compliance, not just animal welfare, because zoonotic risk runs both directions.
Staff health policy needs to be explicit, not assumed. Anyone bitten, scratched, or exposed to a suspected zoonotic case should have a clear reporting path and know when to seek medical evaluation. Where local guidance recommends it, staff working closely with wildlife or high-risk intake should discuss rabies pre-exposure vaccination with their own physician. When in doubt about an outbreak’s scope, loop in your local public health authority early rather than managing it in isolation.
Humane Handling and Restraint: Reducing Injury on Both Ends of the Leash
Forceful restraint is a last resort, not a default technique, and every injury log at every shelter tells the same story: most bites happen when handlers skip the low-stress option and reach straight for physical control. Towels for cats, distraction techniques for anxious dogs, and positive reinforcement during routine handling all reduce the odds of an animal feeling cornered enough to react.
- Train every handler on low-stress handling before they’re cleared for independent restraint
- Reserve chemical sedation for cases where a veterinarian has approved it, not as a convenience shortcut
- Limit control pole use to trained staff only, with annual re-certification, since improper use injures animals and erodes public trust
- Inspect handling equipment (leashes, poles, muzzles) monthly and retire anything frayed or cracked
Pro Tip: Post a one-page fight response card near every kennel bank. In the seconds after a dog fight breaks out, staff shouldn’t have to recall a training module. They need a visual reminder: grab the air horn or spray deterrent, separate on a count, never reach into the middle.
Fight response protocols need to be rehearsed, not just written. Establish a clear separation sequence, noise deterrent first, physical barriers second, direct intervention only as an absolute last resort, and make human safety the first priority every time, even when it means an animal takes longer to recover. Rescue-specific handling techniques covered in resources like dog rescue training guides can supplement in-house training modules, particularly for volunteers new to reactive or fearful animals.
How Often Should You Inspect and Maintain Your Facility?
Daily, weekly, and monthly inspections each catch different failure points, and skipping any one of them is how a small crack in a fence line becomes an escaped animal or an injured visitor.
- Daily: enclosure latches, water availability, visible fencing damage, and emergency exit clearance.
- Weekly: electrical panels, lighting in high-traffic areas, and any equipment flagged during daily checks that needs follow-up.
- Monthly: full perimeter fencing walk, water features, backup generator function test, and HVAC or ventilation system checks.
Log every inspection with a date, inspector’s name, and any issue found. Assign each fix a deadline and an owner, and track it until it’s closed, not just noted. The BVZS wildlife facility guidelines stress that perimeter integrity, tree limbs, and water features are the maintenance items facilities most often let slide, right up until they cause an incident.
Security matters as much as maintenance. Deter theft and unauthorized animal release with controlled access points, cameras where budget allows, and a sign-in log for anyone entering after hours. Plan for utility failure before it happens: a backup generator and secondary filtration aren’t luxury items once you’ve calculated what a multi-day power outage would cost in medical refrigeration losses alone.
Turning Incidents Into Improvements: Reporting and Root-Cause Analysis
Every incident report should capture five things fast: who was involved, what happened, where, the contributing factors, and what was done immediately to contain it. Speed matters here more than polish. A report filed the same day beats a perfect report filed a week later after details have blurred.
- Encourage near-miss reporting explicitly, and don’t punish staff for reporting their own mistakes
- Review near-miss data monthly alongside actual incidents, since near-misses often predict where the next real injury will happen
- Use a simple root-cause template: what happened, why it happened, what control failed, what changes it
- Route every root-cause finding into one of three buckets: a policy update, a training addition, or an engineering fix
A shelter that treats incident reports as blame documents will see reporting dry up within months. A shelter that treats them as improvement data will catch its next serious injury before it happens, not after.
Implementation Aids and Emergency Communication Templates
Rolling out a full safety program doesn’t mean building every template from scratch. Ipuppee publishes practical guides that shelters can adapt directly into their EAP and training materials, particularly around emergency communication and preparedness.
- The dog emergency preparedness guide outlines contact-list structures and planning steps that translate well into a shelter’s front-page emergency contact sheet
- Emergency response plan guidance offers checklist formats useful for training new staff on drill procedures
- The pet emergency protocol guide breaks down protocol structure in plain language, a useful model when drafting your own SOPs
Communication tools built for direct, immediate alerts, the same category of device Ipuppee designs for dogs and their handlers, illustrate a broader principle worth applying inside your facility: the fastest possible signal between the person who spots a problem and the person who can act on it. During a drill, that might mean a two-way radio system or a simple alert protocol that gets a coordinator to the right kennel bank in seconds rather than minutes. Facilities that already use direct-alert communication tools for behavioral or medical monitoring can extend that same infrastructure into emergency drills, cutting the lag between detection and response.
What Rollout Priorities Actually Move the Needle
The shelters that succeed at this don’t build the perfect program first. They build one working piece, prove it functions, and let that early win create momentum for the next one. A common recommendation in liability guidance backs this up directly: addressing one serious risk at a time with real enforcement beats a comprehensive plan that never gets fully adopted.
The failure modes are predictable. Training happens once and never gets reinforced. PPE gets bought in one size and staff stop wearing gloves that don’t fit. Emergency contact lists go stale because updating them means reprinting an entire manual. Each of these has a cheap fix, and each fix matters more than adding a new policy nobody asked for.
Measure success by whether staff can recite the plan for the risk you just closed, not by how thick the manual has gotten.
— Andrew
How Ipuppee Supports Emergency Communication and Drills
There are Wi-Fi enabled alert devices available that let a dog send a direct signal to a handler, complete with live video and two-way audio, along with training resources built for fast, clear communication an EAP depends on. For a shelter refining its emergency drills, the gap is rarely the plan itself, it’s the seconds lost between someone spotting a problem and the right person hearing about it.
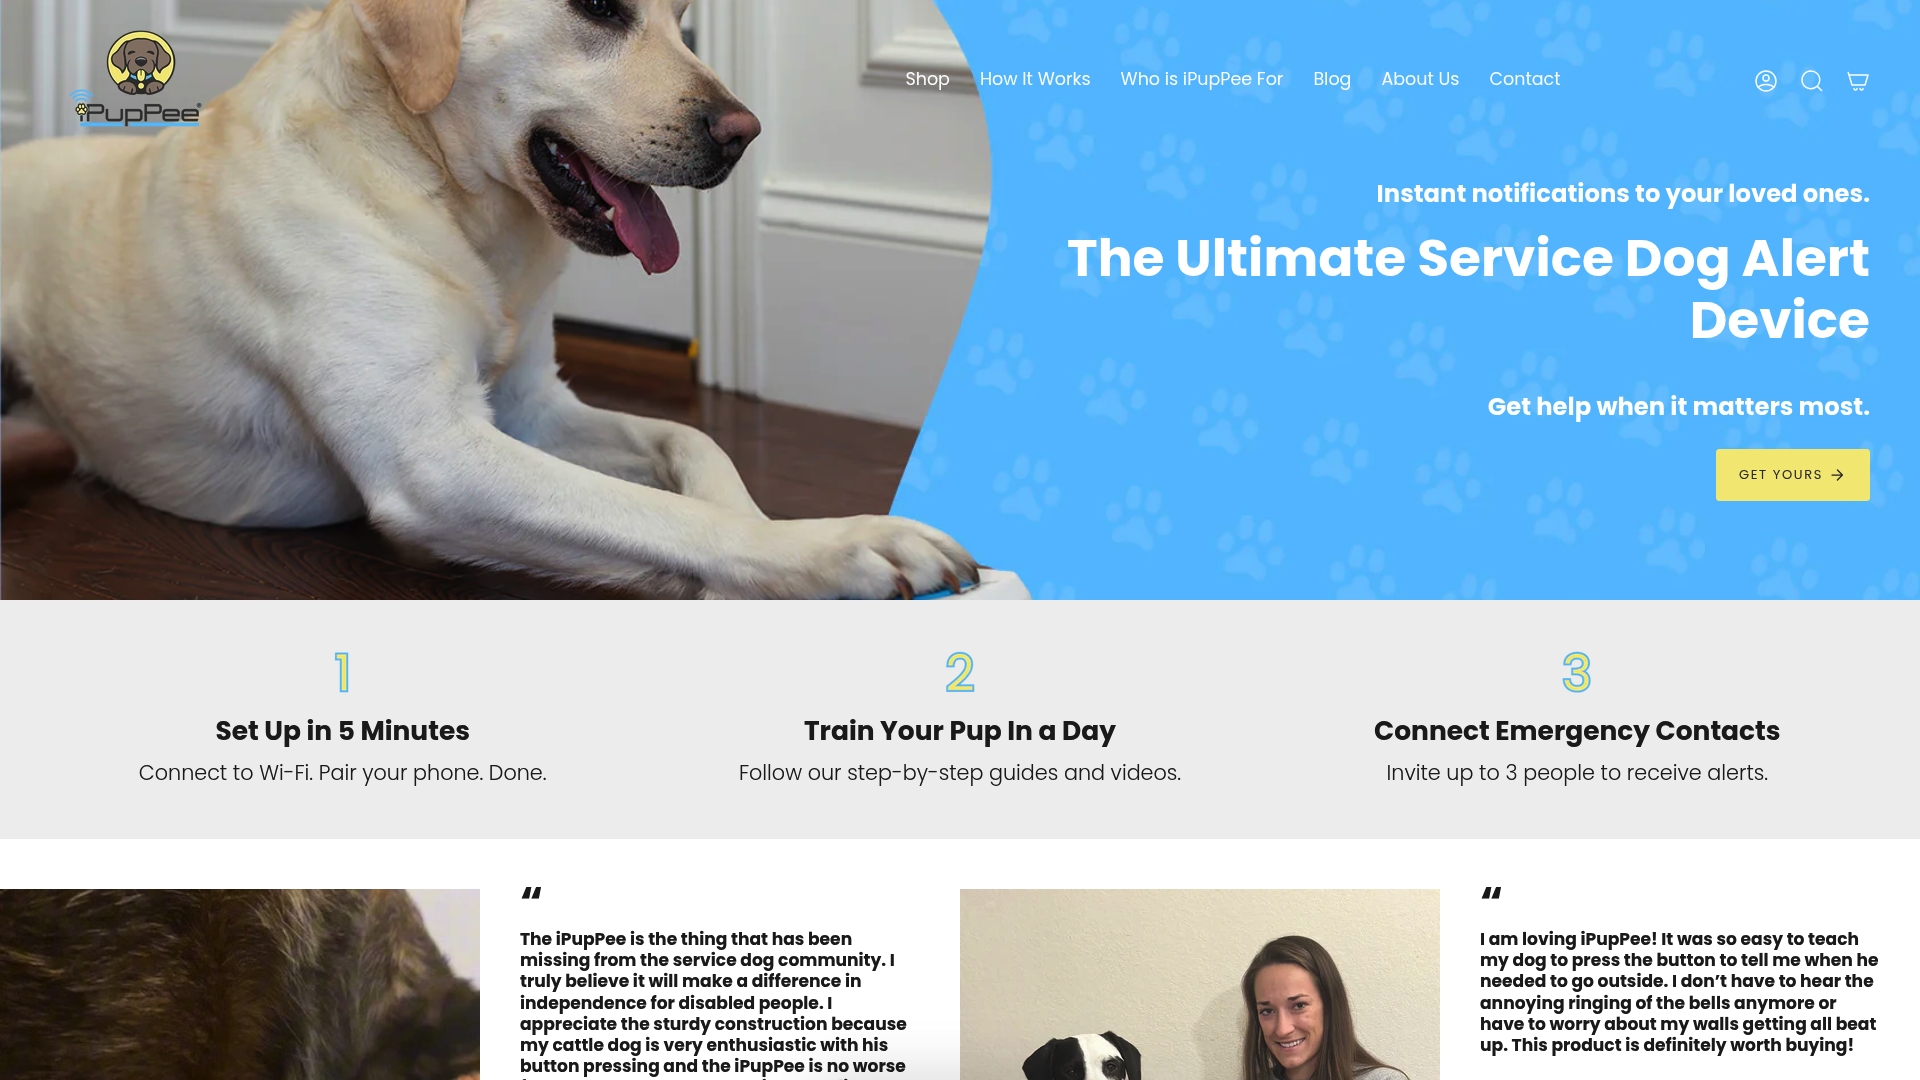
That’s the same problem Ipuppee’s device and training course were built to solve for individual dog owners, and the underlying communication workflow, direct alerts instead of relying on someone happening to notice, translates naturally into a shelter’s drill routine. Pair it with resources like the emergency communication guide or training skills for emergencies to build out staff-facing communication drills alongside animal-facing ones.
Try it in one high-traffic area first, your isolation ward or your intake bay, and measure how much faster your team responds during the next drill. Visit Ipuppee to see the device and training course available for facilities ready to test it.
Where to Verify the Details
Regulatory specifics vary by state and country, so verify local requirements before finalizing your program.
- ASV Guidelines for Standards of Care in Animal Shelters for handling and housing standards
- OSHA’s Evacuation Plans and Procedures eTool and Ready for EAP templates
- HSE guidance on incidents and emergencies for public-facing event and evacuation procedures
Sources
- Guidelines for Standards of Care in Animal Shelters
- Evacuation Plans and Procedures eTool - OSHA
- Management of Animal Care and Use Programs — Chapter 14 Occupational Safety and Health
- Ready
- HSE — Incidents and emergencies (event safety guidance)
FAQ
How Do I Implement Safety Protocols at a Rescue Facility?
Start with a hazard assessment to identify your highest-risk issue, then build a written policy, train staff on it, and document a sign-off before moving to the next risk. Layer in the emergency action plan and biosecurity SOPs once the highest-priority hazard has a working, enforced policy.
What Are Examples of Safety Protocols in a Shelter Setting?
Common examples include quarantine and isolation procedures for new intakes, low-stress handling SOPs for reactive animals, PPE requirements for cleaning and medication tasks, and a written emergency action plan with a designated coordinator and evacuation routes.
What Are the 7 Basic Safety Rules for Animal Facilities?
There’s no single universal list, but most shelter safety programs converge on these core practices: documented hazard assessments, a written safety manual, staff training with sign-off, PPE matched to task, quarantine protocols, facility inspections, and incident reporting with follow-up corrective action.
What Are the 5 Freedoms of Animal Welfare?
The five freedoms are freedom from hunger and thirst, freedom from discomfort, freedom from pain, injury, or disease, freedom to express normal behavior, and freedom from fear and distress, and they form the welfare foundation that shelter handling and housing protocols are built around.
Can Communication Devices Support Shelter Emergency Drills?
Yes. Direct-alert tools that speed up the signal between staff and a coordinator, the same underlying communication category Ipuppee builds for dog owners, can shorten response times during drills when adapted to a facility’s specific layout and staffing.