

At intake, create the animal’s record, scan for a microchip, set the intake type and hold dates, and isolate if there’s a health risk. Everything else follows from those four actions.
Do this before anything else:
- Open a unique electronic record with the animal’s ID, intake type, and source or finder contact.
- Scan the entire body for a microchip and log the number, even if you expect it’s blank.
- Move any animal with visible injury, aggression, or signs of illness straight to isolation and note the time.
Key Takeaways
Reliable rescue intake documentation depends on scanning for a microchip, recording accurate hold dates, and entering every signed form into one authoritative database the same day.
| Point | Details |
|---|---|
| Create the record first | Open a unique electronic record with ID, intake type, and source contact before anything else. |
| Scan the whole body | Run a universal scanner across the entire animal, not just the standard spot, and log chip status immediately. |
| Capture multiple relinquishment reasons | Use conversational interviewing and multi-select fields so program planning reflects real community needs. |
| Digitize same-day | Upload signed forms, CVIs, and rabies certificates to the record the day intake happens, not later in the week. |
| Use Ipuppee’s checklist and training video | Download the printable intake checklist and short training resource at ipuppee.com to standardize volunteer training. |
Table of Contents
- Rescue Intake Documentation Guide: The First 10 Minutes
- What Fields Belong on Every Intake Form?
- How Do You Scan and Record a Microchip Correctly?
- Which Pathway Should This Animal Take?
- Building a Recordkeeping System That Holds Up to Audit
- What Paperwork Do Transfers and Ownership Changes Require?
- How Do You Train Staff to Document Intake Consistently?
- Why Intake Documentation Quality Shapes Outcomes
- Get the Printable Intake Checklist and Training Video
- Sources
Rescue Intake Documentation Guide: The First 10 Minutes
Every intake starts with a type decision, and that choice drives the paperwork, the hold clock, and the animal’s path through your system. The five standard types are stray, owner surrender, transfer from another organization, return of a previous adoption, and seizure or law enforcement hold. Get this wrong at the front desk and you’ll be untangling it in your database for weeks.
- Secure and assess. Get the animal into a carrier or kennel, check for obvious injury or aggression, and assign holding space that matches temperament and health status.
- Scan and photograph. Run a universal scanner over the whole body, not just between the shoulder blades, and take photos from at least three angles for identification and case files, a step PetFriend’s intake guide lists as a core action at every shelter.
- Score for stress. A quick Fear/Anxiety Score (FAS) at intake tells staff whether an animal needs a quiet space before handling continues.
- Log the clock. Record the exact date and time of stray-hold start or surrender acceptance. This single timestamp determines legal disposition later.
Pro Tip: Keep a laminated intake type chart at the front desk. New volunteers waste more time guessing between “stray” and “surrender” than any other step in the process.
What Fields Belong on Every Intake Form?
A complete intake form does two jobs at once: it protects the animal medically and behaviorally, and it protects your organization if a dispute or audit comes up later. Skimpy forms cause both kinds of failure.
- Contact and source details: finder or owner’s full name, phone, address, and, for surrenders, proof of ownership or prior vet records.
- Animal identity: species, breed, approximate age and weight, coat markings, and any existing microchip or tattoo number.
- Intake history: where and when the animal was found or surrendered, plus multi-select reasons for relinquishment rather than a single dropdown. HASS intake triage guidance recommends conversational interviewing here specifically because a checkbox rarely captures the real story, and capturing several reasons at once gives your program team something to act on later.
- Medical and behavioral snapshot: current medications, known conditions, bite history, and reactions to handling.
- Signature and date: the surrendering party or finder signs and dates the form, and staff scan or photograph it into the record the same day.
Skipping the multi-select relinquishment field is the most common shortcut we see, and it’s the one that costs the most later when you’re trying to explain why intake numbers spiked.
How Do You Scan and Record a Microchip Correctly?
A missed chip is one of the most preventable reasons a reunited family never happens. The fix is procedural, not technical.
- Pass the universal scanner slowly over the entire body, shoulders, hips, flanks, and legs, not just the standard between-the-shoulder-blades spot.
- Record the chip number and registration status (registered, unregistered, or no chip found) directly in the intake record, not on a sticky note.
- Run a basic intake exam: weight, visible wounds, temperature if something looks off, and note which vaccines were given that day as recommended in The most common problems at the vet – Gutsy.
- Isolate any animal showing signs of a contagious illness, and log the isolation start date and the specific symptoms that triggered it.
PetFriend’s step-by-step process treats whole-body scanning as a baseline, not an extra step, and for good reason: a chip that goes unrecorded at intake is functionally the same as no chip at all. If your organization handles a lot of found dogs, an alert device that lets a dog signal for help can complement chip data once the animal is placed, but the chip scan itself has to happen at intake, every time, no exceptions.
Which Pathway Should This Animal Take?
Pathway planning is where good intake data pays off immediately. The fields you captured in the first ten minutes decide which of three routes an animal takes.
- Return-to-home first. For stray cats especially, the exact location found, cross streets, nearby landmarks, matters more than almost any other field. CatIntake pathway planning guidance treats that location detail as the single fastest way to reunite a cat before it ever enters the shelter system.
- Retention over surrender. Before accepting a surrender, ask how long the family has had the animal and whether a temporary resource, food assistance, behavior help, could keep the animal home instead.
- Transfer or foster-first. Animals with significant medical needs, behavioral flags, or no shelter capacity go to a transfer partner or foster home, and the record should note exactly why that path was chosen, not just that it was.
Document every exception to standard pathway rules with a short reason. Auditors and new staff both need to know why an animal skipped the usual route.
Building a Recordkeeping System That Holds Up to Audit
Paper forms are fine at the counter, but they’re a liability once they leave your hands. Get every signed form into your authoritative database the same day, following the same logic Burlington Animal Services built into its own intake procedure.
- Use one system as the single source of truth, and enter data once rather than duplicating it across a spreadsheet and a database.
- Standardize your dropdowns and multi-select fields for relinquishment reasons and intake subtypes so reports actually mean something across months and volunteers.
- Upload health certificates (CVIs) and rabies certificates directly to the animal’s digital file, especially for any animal crossing state lines.
- Set access controls so only trained staff can edit closed records, and check backups weekly at minimum.
Burlington’s intake records SOP requires a unique electronic record at intake and mandates uploading paper forms to its Chameleon database specifically so records stay searchable during transfers or inspections. Oregon’s record-keeping toolkit sets a practical benchmark here too: complete the full intake record within 24 hours, attachments included.
Pro Tip: If your database allows tags or custom fields, create one for “reason for relinquishment, secondary” alongside your primary field. You’ll thank yourself when someone asks for a trend report six months from now.

What Paperwork Do Transfers and Ownership Changes Require?
Transfers and ownership changes carry more legal weight than a routine stray intake, and the paperwork should reflect that.
- A signed ownership transfer or surrender agreement with both the releasing party’s and your organization’s signatures.
- A current health certificate (CVI) for any animal crossing state lines, along with existing veterinary records.
- Proof of rabies vaccination, retained per your organization’s record retention policy.
- A documented note if intake is temporarily paused due to lack of foster space or funding, dated and signed by a supervisor.
Municipal SOPs and breed-rescue transfer policies consistently require these four elements before an animal moves between organizations, and missing even one can delay a transfer by days.
How Do You Train Staff to Document Intake Consistently?
Consistent documentation comes down to who owns each step and how often you check the work, not how detailed your form template is.
- Assign clear roles. One person creates the record at intake, a second reviews it before end of day, and every record gets entered the same day it’s created, no exceptions for busy shifts.
- Train on interviewing, not just scanning. New volunteers need practice with conversational interviewing for surrender reasons and hands-on repetition scanning for microchips; Ipuppee’s training resources are one place to build that muscle memory.
- Run a daily QA pass. Spot-check a handful of records each day for missing attachments, blank stray-hold dates, or unrecorded microchip scans.
- Track three metrics. Time to complete intake, percentage of records with microchip data logged, and percentage of surrenders with a fully signed transfer form.
Pro Tip: Post the previous week’s QA error rate on the break room whiteboard. Visibility fixes sloppy habits faster than any memo.
Why Intake Documentation Quality Shapes Outcomes
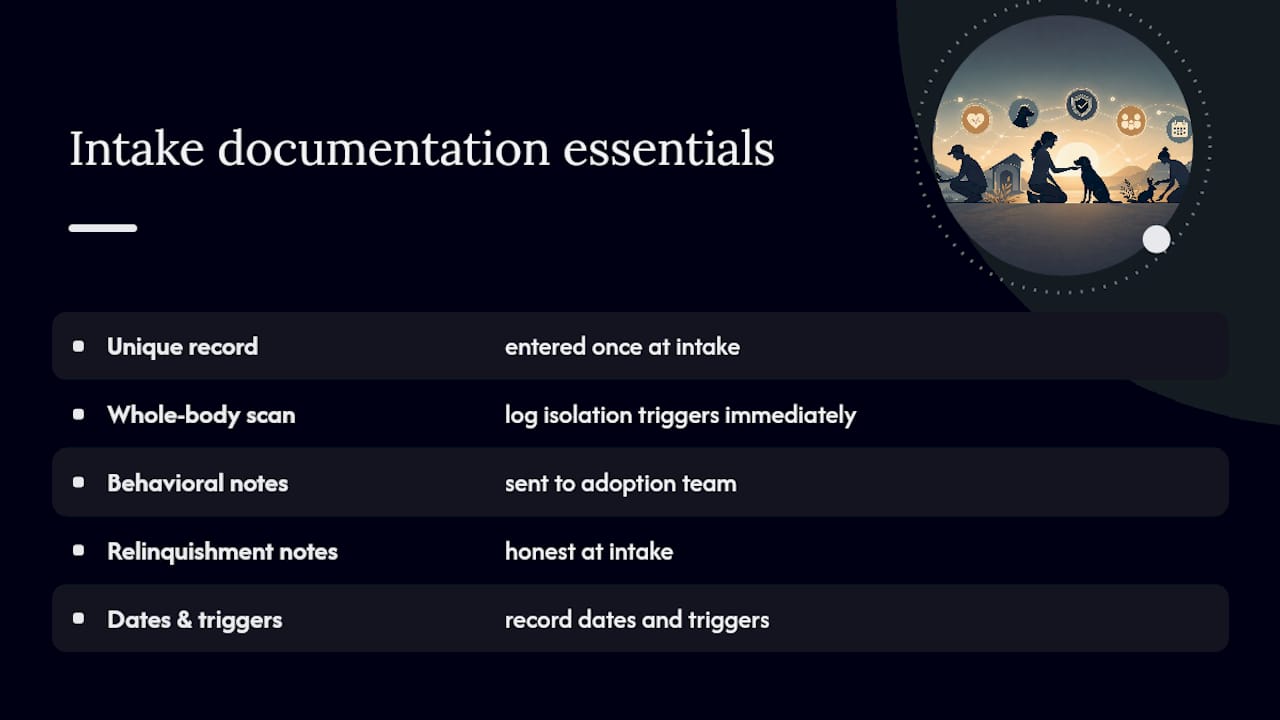
Thorough intake records shorten stray holds because staff aren’t chasing missing dates, cut medical risk because isolation triggers get logged the moment they happen, and improve adoption matches because behavioral notes actually reach the adoption team. None of that happens by accident. It happens because someone built the habit of entering data once, correctly, at the point of intake rather than reconstructing it later from memory.
Adapt every checklist here to your local shelter law and your own database’s field names. What matters is that the underlying discipline, unique record, whole-body scan, honest relinquishment notes, stays intact.
— Andrew
Get the Printable Intake Checklist and Training Video
Ipuppee is the alternative to piecing together intake forms from scattered templates: one downloadable checklist and a short training video that walk a new volunteer through the same steps covered here, without the hunting-and-guessing that eats up a shift. The checklist mirrors the intake types, scanning steps, and documentation fields from this guide, formatted so it can sit on a clipboard at your front desk.
If your organization handles regular surge periods, adoption events, or seasonal intake spikes, the same resource library covers pathway planning and post-intake care follow-up. Visit Ipuppee to download the checklist, watch the training video, and reach out if your team needs bulk training materials for a full volunteer cohort.
Sources
- Burlington Animal Services: Intake Records SOP (2025)
- Animal Rescue Record-Keeping Toolkit (Oregon)
- The Animal Shelter Intake Process: Step-by-Step Guide | Pet Friend
- CatIntake and Pathway Planning