

A repeatable, device-based foster network can be operational in four weeks. The core program: procure standardized communication buttons (iPupPee starter kits work well for this), lock in one shaping-based training protocol every household follows, onboard and verify each caregiver remotely or in person, issue a shared digital pet profile through a tool like PetPort, and track three metrics daily: presses per day, percentage of context-appropriate presses, and unresolved “help” events. That is the whole spine. Everything below is the detail that makes it hold together across ten, twenty, or fifty homes.
Key Takeaways
A device-based foster network succeeds when procurement, training, onboarding, documentation, and monitoring are standardized before the first kit ships.
| Point | Details |
|---|---|
| Standardize hardware first | Use one SKU across all households; include non-slip mats and spare units in every kit. |
| One protocol, one word to start | Begin with a single high-frequency word; require 80–90% context-appropriate presses before adding buttons. |
| Verify caregivers, not just dogs | Use a two-part competency rubric and re-check at two and eight weeks to catch response inconsistencies early. |
| Digital handoff is non-negotiable | A shared LiveLink-style profile with device IDs, training notes, and medical info prevents lost context at every transition. |
| Ipuppee kits for network rollouts | Ipuppee’s standardized button kits and training guides support consistent deployment across multiple foster households. |
Table of Contents
- How do you set up a pet foster network around communication devices?
- What does a repeatable button training protocol look like?
- How do you onboard and verify multiple foster households at scale?
- Where should devices be placed in different home types?
- What should a pet handoff record include?
- How do you track device use and fix common problems?
- Fleet: a button training case study in a foster-to-adopter transition
- How do you budget and scale a device-based foster network?
- What ethical rules protect animals and caregivers in a device program?
- What coordinators get wrong about device programs
- Ipuppee starter kits for your foster network
- Sources
How do you set up a pet foster network around communication devices?
Start with device selection, because everything downstream depends on hardware consistency.
Which features actually matter in a communication device
The right button specs vary by dog size: low-profile, lighter-press buttons for small dogs; sturdier, higher-profile buttons for large breeds. Across all sizes, prioritize recordable audio with a clear playback volume, a pressure threshold the dog can trigger reliably, a non-slip base or foam mat compatibility, and a housing that resists chewing. Replaceable batteries and a simple reset function matter more than most coordinators expect once you are managing thirty units across multiple homes.
Starter kit per household: a few labeled buttons plus one central alert device. Order some extra units as spares. Standardize on a single SKU so every foster trains on identical hardware.
Procurement checklist:
- Confirm SKU and firmware version match across all units
- Label each device with a serial number before shipping
- Include a non-slip mounting mat and two-sided tape in every kit
- Build a simple inventory spreadsheet: serial number, assigned household, ship date, and warranty expiration
- Record the caregiver’s voice for each button before the kit ships, or send instructions for self-recording using a familiar voice
What does a repeatable button training protocol look like?
The core training sequence is: model the button yourself before the event occurs, respond every time the dog presses it, and fade treats once the contingency is established. That sequence is the same whether the dog is a ten-week-old rescue or a three-year-old transfer.
Free shaping to reliable press: four steps
Step 1 — Free shaping. Place the button in the relevant location. Press it yourself immediately before the event (going outside, offering a toy, opening the crate). Do not prompt the dog. Wait for any nose or paw contact with the button and reward it.
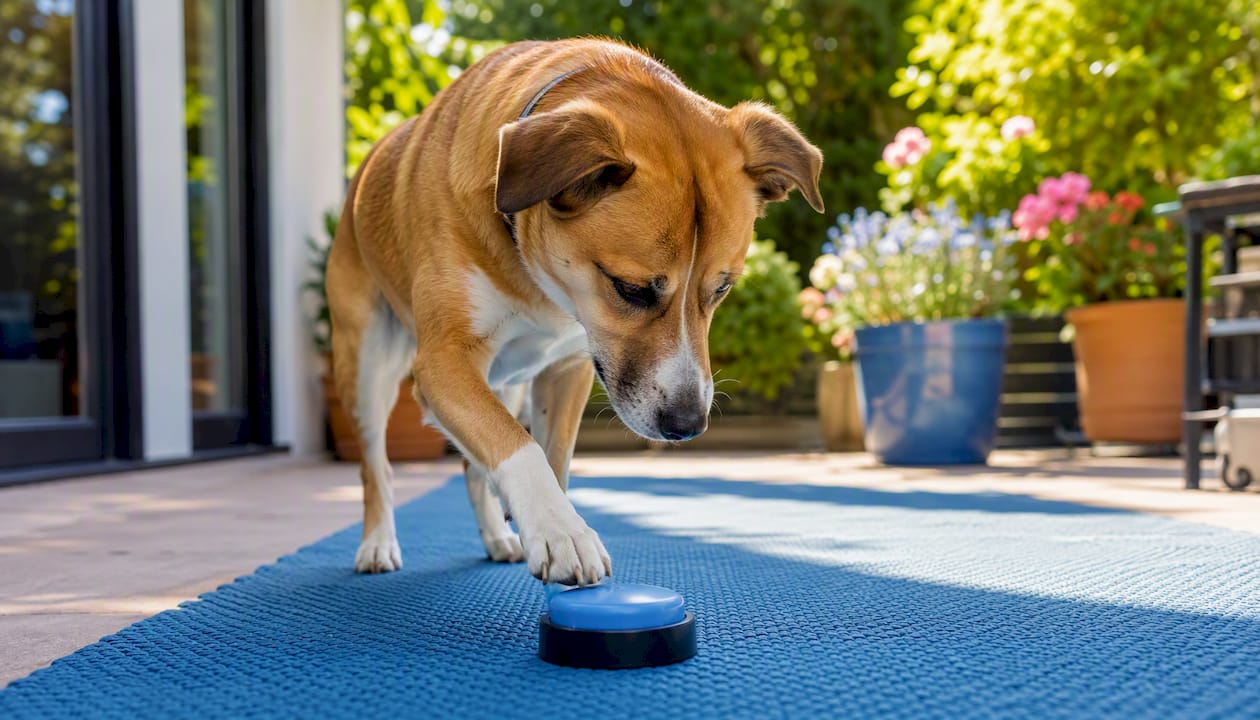
Step 2 — Add consequence. Every press gets an immediate, consistent human response. The dog presses “outside,” the door opens within three seconds. This is the contingency. Without it, the button is just a noise.
Step 3 — Remove the lure. Once the dog presses independently in the right context, stop pre-loading treats. The outcome (the walk, the toy, the attention) is the reinforcer now.
Step 4 — Reliable press. Success criterion: independent press in the correct context, followed by the appropriate human response, the majority of the time across multiple days.
Start with one word only. “Outside” or “help” are the highest-frequency, highest-consequence options for foster dogs. Consistent placement and consistent human language speed learning faster than any other variable.
Reinforcement schedule: high-frequency pairing in the initial stage (every real event gets a modeled press), treat fading once the dog presses independently, and a firm rule: if the caregiver cannot respond to a press promptly, remove that button temporarily rather than let unanswered presses erode the contingency.
Pro Tip: Keep sessions under five minutes and tie every repetition to a real event, not a staged drill. Log every press for the first two weeks in a shared spreadsheet. Early data reveals mis-labeling and accidental reinforcement before they become habits.
How do you onboard and verify multiple foster households at scale?
The pipeline has five stages, and each one has a clear gate before the next opens.
- Application review. Confirm the home environment meets placement criteria (see Section 5). Approve and assign a device kit.
- Kit shipment. Ship the standardized kit with a printed quick-start card and a link to the video micro-course.
- Mandatory micro-course. A 20-minute video module plus a short quiz covering device handling, the four-step shaping protocol, placement rules, and welfare red flags. Passing score: 80%.
- Supervised first session. A 15-minute video call or in-person visit where the coordinator watches the caregiver model the button and respond to a press. This is the technical competency check.
- Competency sign-off. Two-part rubric: technical (correct placement, volume check, basic troubleshooting) and behavioral (consistent response within three seconds, correct reinforcement, no coercive prompting). Both parts must pass before the household is certified.
Re-check cadence: a brief check-in call or form at two weeks, a fuller review at eight weeks. Use templated video scripts so any staff member or senior volunteer can run the supervised session without coordinator presence. For introducing devices step by step, Ipuppee’s onboarding guides can be adapted directly into the micro-course curriculum.
Where should devices be placed in different home types?
Placement is not decoration. Buttons work through location-sound-outcome association, so a button that moves loses its meaning fast.
Placement rules by button type:
- Exit/entry words (“outside,” “walk”): mount at nose or paw height beside the primary exit door, on a non-slip mat secured with two-sided tape
- Play or object words (“toy,” “ball”): place near the toy bin or play area, not in a high-traffic corridor where other pets step on it
- Help or alert buttons: position in the dog’s most-used resting area, visible and reachable from a lying position
Do/don’t list:
- Do mount at the dog’s natural nose or paw height
- Do get all household residents to agree on labels and response rules before the dog arrives
- Don’t place buttons where other pets in the home frequently walk or rest
- Don’t use movable placement during the learning phase
- Do check housing for chew resistance and confirm battery compartments are not accessible to the dog
All residents in the home must use the same word when they respond to a press. One person saying “let’s go outside” and another saying “okay, out” after the same button press creates ambiguity that slows learning by weeks.
What should a pet handoff record include?
A printed folder gets lost. A shared digital record follows the pet. PetPort’s LiveLinks approach, a living profile updated in real time and shared through one link, is the model worth replicating.
Standard pet profile fields:
- Device serial numbers and recorded labels for each button
- Training start date and current step in the protocol
- Success criteria achieved (which buttons are reliable, at what percentage)
- Unusual cues or idiosyncratic presses the dog uses
- Medical restrictions and dietary notes (a balanced feeding plan documented here prevents gaps during transitions)
- Primary coordinator contact and emergency vet contact
Handoff checklist:
- Physical: full device kit, mounting hardware, non-slip mats, spare batteries
- Digital: shared LiveLink-style record with care notes, training log, and device IDs
- Sign-offs from both outgoing and incoming caregivers
- “First 24 hours” protocol: the adopter checks in by text or form within 24 hours to confirm device placement and the dog’s first press attempts
How do you track device use and fix common problems?
Log early and log simply. A shared form or spreadsheet with four columns covers everything a coordinator needs.
| Date/Time | Device ID & Label | What Happened | Caregiver Response | Follow-Up Needed |
|---|---|---|---|---|
| Example row | Button 2 / “outside” | Dog pressed 3x in 5 min | Took dog out first press; ignored repeats | Check for UTI or anxiety trigger |
Key metrics to watch:
- Presses per day per device (a sudden spike often signals stress or mis-labeling)
- Percentage of context-appropriate presses (target: above 80% by week four)
- Unresolved “help” events (any press that got no response within the session)
- Welfare flags: frantic repeated presses, aggression after a denied request, or device-triggered resource guarding
Common failure modes and fixes:
| Failure Mode | Immediate Fix | Prevention |
|---|---|---|
| Button sliding | Re-secure with two-sided tape and non-slip mat | Include mat in every kit |
| Muffled audio | Re-record in a quiet room, raise volume | Test audio before shipping |
| Mis-labeled button | Retrain from Step 1 with a new label | Use clear, single-action words only |
| Over-reinforcement | Fade treats; reinforce with the outcome only | Follow the reinforcement schedule |
| Caregiver non-response | Retrain the caregiver, not the dog | Competency re-check at two weeks |
Fleet: a button training case study in a foster-to-adopter transition
Fleet arrived at a foster home as a high-anxiety transfer with no prior button experience. The foster coordinator assigned three buttons: “room” (for voluntary crate time), “puzzle” (for enrichment), and “kong.” The shaping and careful pairing approach was critical here because “room” carried a risk of poisoning the crate association if the button was ever used coercively.
The foster modeled “room” every time Fleet voluntarily entered the crate, never using it as a command. Within ten days, Fleet pressed “room” independently when overstimulated by household activity. The “puzzle” and “kong” buttons followed within three weeks. By week six, Fleet had a clear self-soothe vocabulary and a measurable drop in stress-related behaviors.
The adopter received the full device kit, the shared digital profile with all three button labels and training notes, and a 24-hour check-in call. Fleet continued using all three buttons in the new home without retraining. The lesson: clear consequences and small-session shaping matter, but the handoff documentation is what makes the continuity possible.
How do you budget and scale a device-based foster network?
| Annual replacement rate (15–20% of units) | — | —
Funding options that work in practice: small grants from local community foundations, device adoption fees (ask adopters to pay a nominal fee to keep the kit), and targeted donation drives where donors sponsor a named “starter kit” for one foster home. Shelters with 501©(3) status can often access pet welfare micro-grants through organizations like PetSmart Charities or the ASPCA.
Inventory lifecycle: track warranty expiration dates in the serial-number spreadsheet, run a firmware or battery check every six months, and plan full device replacement on a 2–3 year cycle depending on use intensity.
What ethical rules protect animals and caregivers in a device program?
Devices are communication tools, not compliance tools. The line between the two matters.
Core rules:
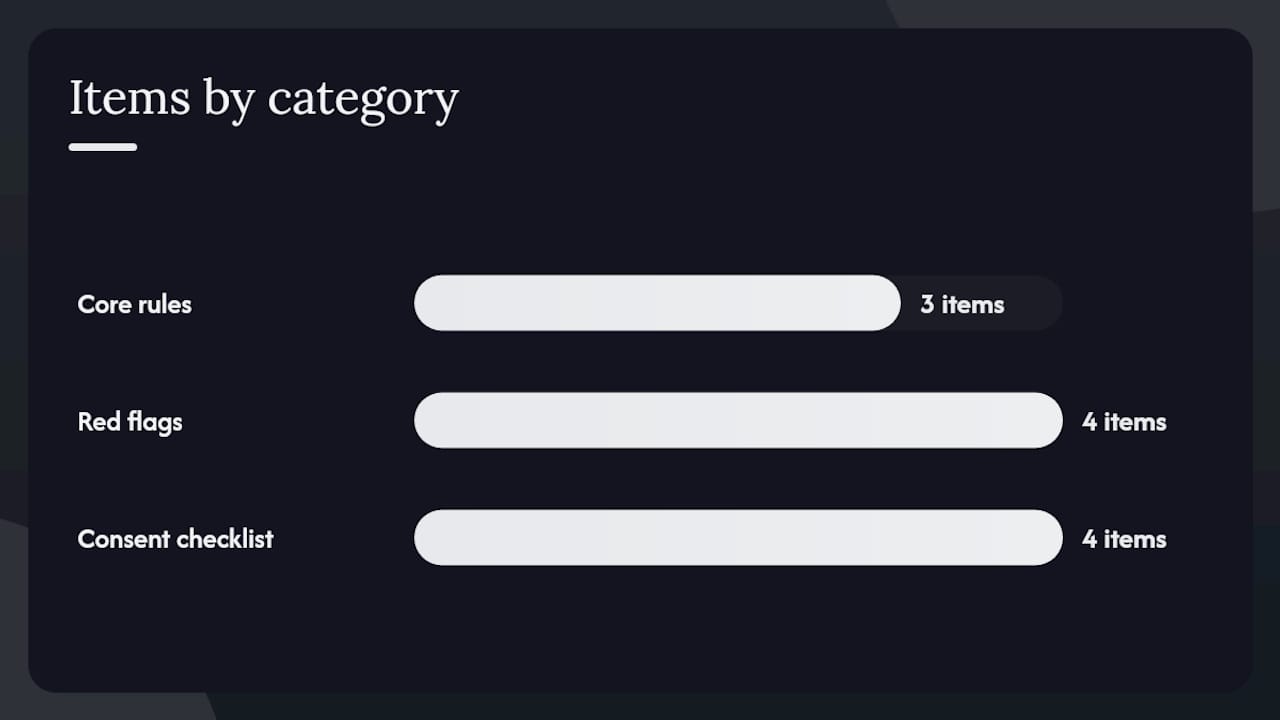
- Never use a button press as a command or to coerce a behavior
- Do not make a safe space (crate, bed, room) punitive by pairing it with a button the dog did not choose to press
- Do not reward compulsive or frantic pressing; acknowledge the press, offer an alternative, and log the event
Red flags that require escalation to a behavior specialist or vet:
- Repeated, frantic pressing within a short window (more than five presses in two minutes with no context change)
- Pressing paired with visible stress signals: panting, whale eye, tucked tail, or pacing
- Sudden aggression after a denied request
- Device-triggered resource guarding (dog blocks the button from other pets or people)
Informed consent checklist for fosters and adopters:
- Written explanation of what each button is trained to mean
- Description of expected behaviors and the caregiver’s required response
- Clear opt-out procedure: how to pause the program and who to contact
- Agreement that all household members will follow the same response protocol
For detailed safe training guidance, Ipuppee’s safety resources cover these welfare boundaries in depth.
What coordinators get wrong about device programs
The most common mistake is treating the device as the intervention. It is not. The device is a prompt. The intervention is the human response.
Coordinators spend weeks sourcing the right buttons, building onboarding decks, and shipping kits, then discover that three households have dogs pressing buttons that nobody answers consistently. The dog learns nothing useful. Worse, unanswered presses teach the dog that communication is unreliable, which can increase anxiety rather than reduce it.
The fix is not more training for the dog. It is a competency re-check for the caregiver. The two-week check-in exists precisely for this: catch inconsistent response patterns before they calcify. A caregiver who cannot commit to a three-second response window for a high-frequency button should either reduce the number of active buttons or pause the program. That is not a failure. That is welfare-first thinking.
One more thing coordinators underestimate: label clarity. Trainers consistently flag that ambiguous labels (a dog’s name on a button, a label that could mean two different things) create confusion that takes weeks to undo. Single-action words only. “Outside” beats “walk.” “Help” beats “mom.”
Ipuppee starter kits for your foster network
Standardizing on a single device SKU cuts training time and eliminates the hardware variables that derail consistency across homes. Ipuppee’s communication button kits are built for exactly this use case: recordable audio in a durable, paw-friendly housing, with non-slip base compatibility and clear volume output that works in noisy household environments.
Shelters and rescues with 501©(3) status should ask directly about volume pricing. Ipuppee’s training resources for button communication can be adapted into your micro-course curriculum without starting from scratch, and the dog button communication guide includes sample scripts and troubleshooting tips ready for foster onboarding packets. Visit Ipuppee to review current kit options and request shelter pricing.
Sources
- How To Teach Your Dog To Talk With Buttons: 7 Training Tips — Dogster
- Pushing ALL My Buttons: Dogs Using Communication Buttons - IAABC FOUNDATION JOURNAL
- Dog Talking Buttons: What They Are and How They Work | Camp Bow Wow®
- Dog Sound Board Training: Teach Your Dog to Speak
- PetPort’s foster program and LiveLinks — PetPort