

The National Institute on Aging and the U.S. Consumer Product Safety Commission agree on the same short list of high-priority actions that prevent the most serious injuries at home. Here are the top ones to start today:
- Remove throw rugs or secure them with double-sided tape and non-slip backing
- Install grab bars in the shower, tub, and next to the toilet
- Add handrails on both sides of every staircase
- Improve lighting in hallways, stairwells, and the path from bedroom to bathroom
- Set the water heater to 120°F to prevent scalding
- Test smoke and carbon monoxide detectors monthly; replace batteries annually
- Organize medications in a labeled pill organizer and remove expired bottles
- Clear all pathways of cords, clutter, and furniture that narrows walking routes
- Install deadbolt locks and a door peephole or video doorbell
- Write down an emergency plan with two contacts and a mapped exit route
One thing you can do in the next ten minutes: pull up one throw rug and set it aside. That single action removes one of the most common tripping hazards in any home.
The rest of this guide goes room by room, explains what to prioritize and why, and tells you when to call in a professional.
Key Takeaways
Preventing falls, fire, and medication errors through low-cost, prioritized fixes gives older adults the best foundation for aging in place safely and independently.
| Point | Details |
|---|---|
| Falls are the top priority | Remove throw rugs, add handrails, and improve lighting before any other change. |
| Bathroom fixes are high-impact | Grab bars mounted into studs and non-slip surfaces prevent the most serious injuries. |
| Detectors and inspections save lives | Test smoke and CO alarms monthly; inspect fuel-burning appliances annually. |
| Medication review prevents hospitalizations | Ask a pharmacist annually about interactions, fall-risk drugs, and duplicate therapies. |
| An OT assessment personalizes the plan | A professional evaluation produces a prioritized, person-specific modification list. |
Table of Contents
- 1. Fall prevention is the highest-priority fix for home safety for seniors
- 2. Bathroom safety changes that prevent the most serious injuries
- 3. Smoke, carbon monoxide, and electrical safety every home needs
- 4. Medication safety and emergency preparedness that actually works
- 5. Larger home modifications: when to plan them and how to fund them
- 6. Why a professional home-safety assessment is worth scheduling
- 7. How to talk with a loved one about safety changes
- 8. Room-by-room printable checklist
- What working with seniors and pet owners taught me about home safety
- Sources
1. Fall prevention is the highest-priority fix for home safety for seniors
CDC data show that falls send millions of older adults to emergency departments every year, making them the leading cause of injury-related death and serious injury in this age group. Most of those falls happen at home, and most involve hazards that cost little or nothing to fix.
The fastest wins, in order of impact:
- Remove or firmly secure all loose rugs and mats
- Install handrails on both sides of stairs (not just one side)
- Add motion-activated night lights along the bedroom-to-bathroom path
- Replace worn or slippery stair treads with textured, non-slip versions
- Tuck or remove all floor-level cords
Statistic: Falls are a leading cause of injury among older adults, and the CPSC links many incidents directly to loose rugs, cords, and clutter — common hazards that are fixable in an afternoon.
Pro Tip: When choosing non-slip adhesive strips for stairs or the bathroom floor, look for products with a textured surface rating of at least R10 (the wet-surface grip standard). Avoid smooth vinyl strips — they lose grip when wet. 3M Safety-Walk and Gorilla Grip are widely available options that hold up through repeated cleaning.
One practical afternoon sequence: walk every room with a roll of painter’s tape and flag every cord, rug edge, or furniture leg that sits in a walking path. Then address them in order of how often that path gets used. The bedroom-to-bathroom route at night is almost always first.
2. Bathroom safety changes that prevent the most serious injuries
The bathroom is where the highest concentration of fall and scald injuries happen. Wet floors, slippery tub edges, and sudden temperature changes combine in a small space. The fix list is short, but the installation details matter.
Start with these:
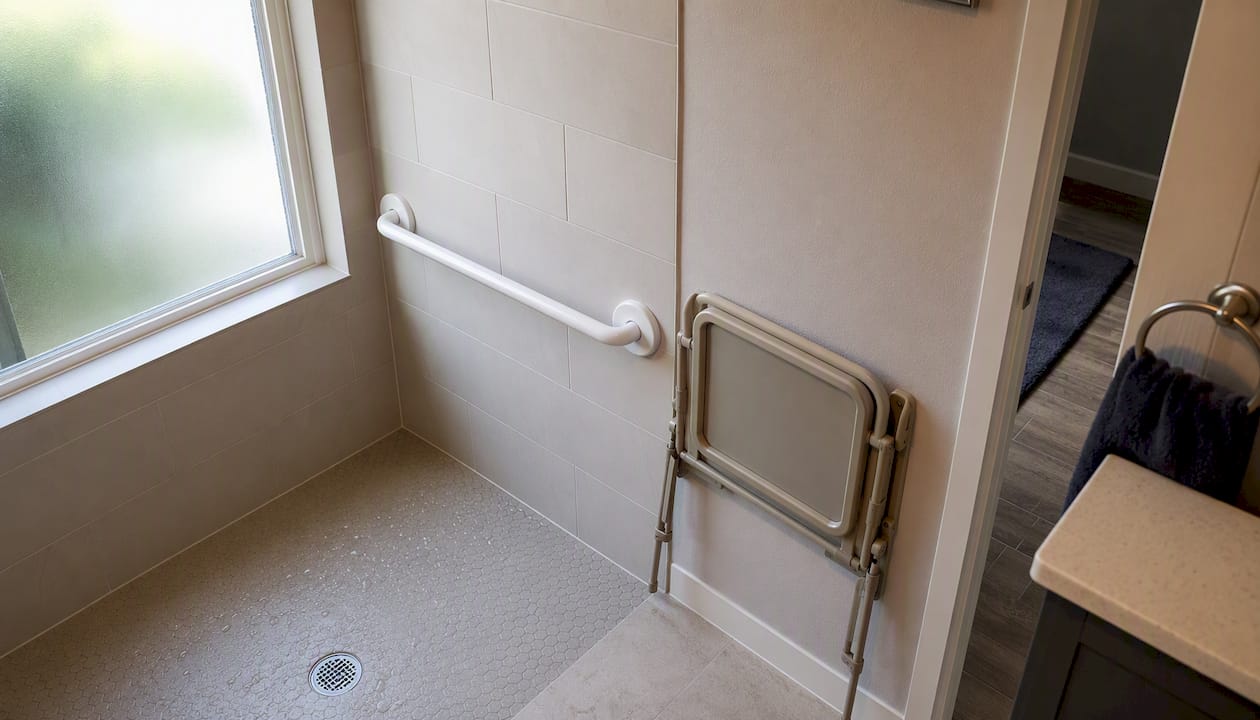
- Grab bars: Mount them into wall studs, not just drywall. A bar anchored only in drywall will pull free under body weight. If studs don’t align with the ideal placement, use a grab bar backing plate or hire a contractor. The AARP recommends placing bars at the tub entry, along the tub wall, and beside the toilet.
- Non-slip surfaces: Apply textured adhesive strips to the tub and shower floor. Replace a smooth bath mat with a suction-cup model that grips the floor even when wet.
- Shower chair or transfer bench: A shower chair lets someone sit while bathing, removing the balance demand of standing on a wet surface. A transfer bench extends outside the tub, so the person slides across rather than stepping over the rim — a meaningful difference for anyone with limited hip mobility.
- Raised toilet seat: A 2–4 inch riser reduces the depth of the sit-to-stand movement, which is one of the most fall-prone transitions in the home.
- Night lighting: A plug-in night light near the toilet or a motion-sensor light under the vanity makes 2 AM trips far safer.
Pro Tip: Set the water heater to exactly 120°F, then test the water at the tap with a cooking thermometer before trusting the fixture’s own temperature markings. Fixture labels drift over time. At 120°F, a scald takes about five minutes of exposure; at 140°F, it takes seconds — a meaningful difference for anyone with reduced sensation.
The DIY line is roughly here: non-slip strips, raised toilet seats, and shower chairs are straightforward. Grab bars that must carry body weight belong on studs, and if you’re not confident about stud location and lag-bolt depth, a handyman visit runs $50–$150 and is worth every dollar.
3. Smoke, carbon monoxide, and electrical safety every home needs
The Mayo Clinic Health System’s household safety checklist recommends smoke and CO alarms throughout the home, slip-resistant surfaces, and annual professional inspection of any fuel-burning appliance. That last point gets skipped more than any other.
The action list:
- Install smoke alarms on every floor, inside each bedroom, and outside sleeping areas
- Place CO detectors near sleeping areas and on every floor with a fuel-burning appliance
- Test both types monthly by pressing the test button
- Replace alarm batteries annually (or use 10-year sealed-battery models)
- Replace the entire alarm unit every 10 years for smoke detectors and every 5–7 years for CO detectors, per manufacturer guidance
- Schedule annual inspection of gas furnaces, water heaters, fireplaces, and dryers
- Install GFCI outlets in bathrooms, kitchens, garages, and any outlet within six feet of a water source
On escape planning: Every household needs one mapped exit route and two named contacts who know the plan. Write the route on paper, post it somewhere visible, and walk it once. If a pet is part of the household, the emergency response plan needs to account for them too — a panicked search for a dog during a fire evacuation costs critical seconds.
Pro Tip: Store matches, lighters, and candles in a single locked drawer or cabinet. Cognitive changes that come with aging can make open flames a genuine risk even for someone who has used them safely for decades. A flameless LED candle costs under $10 and removes the hazard entirely.
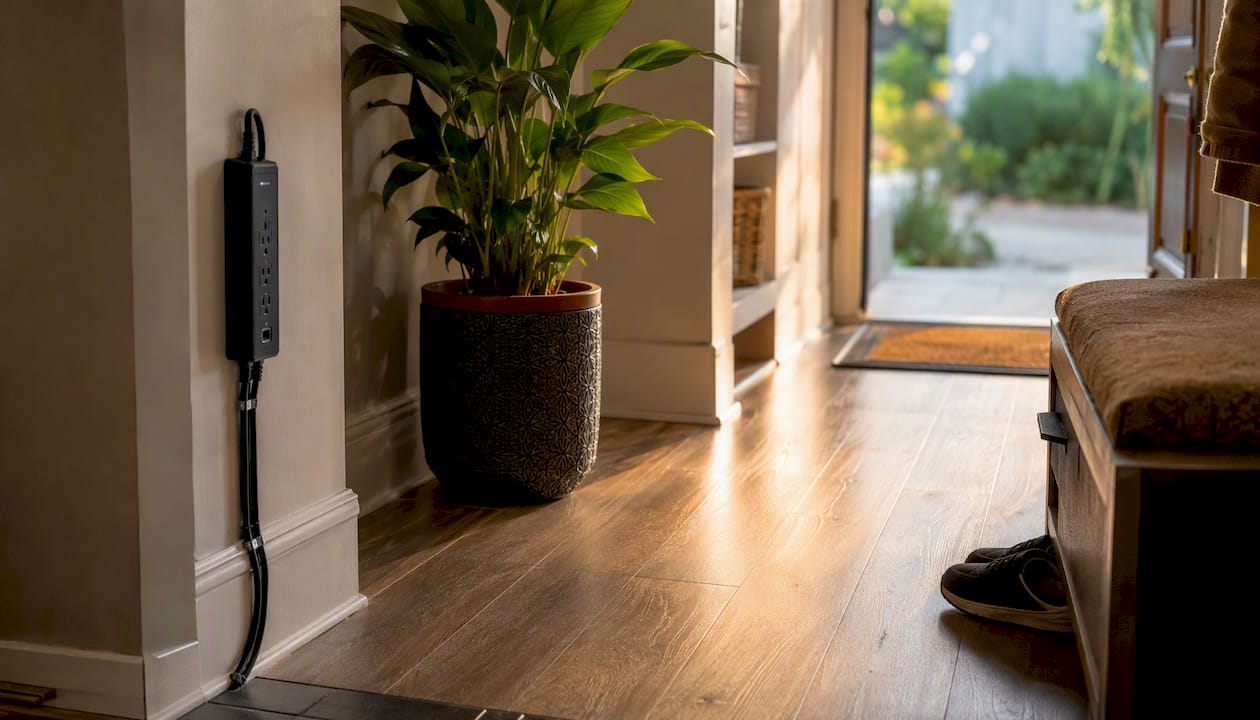
Electrical safety is the quieter risk. Overloaded power strips, frayed cords, and outlets without GFCI protection in damp areas cause fires and electrocution. A licensed electrician can inspect and upgrade a home’s outlets in a few hours.
4. Medication safety and emergency preparedness that actually works
Medication errors are one of the most underestimated home safety risks for older adults. Missed doses, duplicate therapies, and drug interactions cause hospitalizations that look unrelated to medication at first glance.
Medication safety checklist:
- Use a weekly pill organizer with AM/PM compartments
- Ask a pharmacist for a full medication review at least once a year — specifically ask about drug interactions, timing conflicts, and any duplicate therapies
- Remove all expired medications from the home (most pharmacies offer take-back programs)
- Store medications in a cool, dry place away from the bathroom (humidity degrades many drugs faster than people realize)
- Label each bottle with the dose, timing, and what it’s for in large, readable print
On medical alert systems: A personal emergency response system (PERS) is not the same as a home security system. A PERS device — worn as a pendant or wristband — connects the wearer directly to a monitoring center or a designated contact when they press a button or when the device detects a fall automatically. Home security systems monitor doors, windows, and motion, but they don’t detect a person who has fallen silently in a back room. If someone lives alone, a PERS with automatic fall detection is worth serious consideration.
Pro Tip: When scheduling a pharmacist medication review, bring every bottle — including supplements, vitamins, and over-the-counter drugs. Ask three specific questions: “Do any of these interact with each other?” “Are any of these increasing my fall risk?” and “Is there anything here I no longer need?” Pharmacists can answer all three and often catch problems a busy physician visit misses.
Keep a printed emergency contact list on the refrigerator and a duplicate in a wallet. First responders are trained to check both locations.
5. Larger home modifications: when to plan them and how to fund them
Low-cost fixes come first. Once those are done, the question becomes whether permanent structural changes are needed for daily function. The answer depends on mobility, the home’s layout, and how long the person plans to stay.
The most common starting points are the bathroom and the entryway. A roll-in shower or walk-in tub addresses the highest-risk room. A threshold ramp at the front door (typically a few inches of rise) removes a trip hazard and makes wheelchair or walker entry possible. Widening doorways to 36 inches accommodates a standard walker or wheelchair.
Cost ranges vary widely by region and contractor, but bathroom accessibility remodels generally run from a few thousand dollars for targeted changes (shower conversion, grab bar reinforcement) to $10,000 or more for a full roll-in shower installation. Entryway ramps are typically far less expensive.
Where to look for financial help:
- USDA Section 504 program: Single-family housing repair loans and grants for qualifying rural homeowners, including accessibility modifications
- Medicare Advantage: AARP notes that some Medicare Advantage plans cover specific safety installations — shower grips, ramps, accessibility improvements — in certain circumstances. Traditional Medicare generally does not. Call the plan directly to confirm what’s covered.
- Area Agency on Aging: Local AAA offices often know about state and county grants, low-interest loans, and volunteer programs that install basic safety equipment at no cost. Find yours at eldercare.acl.gov.
Pro Tip: Before hiring any contractor for accessibility work, ask whether they hold a Certified Aging in Place Specialist (CAPS) designation from the National Association of Home Builders. CAPS-certified contractors have specific training in aging-in-place modifications and are less likely to recommend changes that don’t match the person’s actual functional needs.
6. Why a professional home-safety assessment is worth scheduling
An occupational therapist brings something a checklist can’t: they watch how a specific person moves through their specific home and identifies the gaps between what the environment demands and what the person can safely do.
What OT assessment delivers: A trained occupational therapist evaluates transfers (getting in and out of chairs, the tub, the car), activities of daily living, kitchen and bathroom access, lighting adequacy, and stair safety — then produces a prioritized list of equipment and modifications tied to that person’s actual movement patterns, not a generic template.
What an OT will typically evaluate:
- Sit-to-stand transfers from chairs, toilet, and bed
- Shower and tub entry and exit
- Stair negotiation and handrail use
- Kitchen reach and appliance access
- Lighting levels in all rooms
- Cognitive factors that affect medication management and emergency response
How to find one:
- Ask a primary care physician for a referral — Medicare Part B covers OT evaluations when medically necessary
- Search the American Occupational Therapy Association’s directory at aota.org
- Look for a CAPS-certified specialist if the focus is home modification planning specifically
Bring measurements of doorways, the bathroom layout, and a list of current medications and diagnoses to the visit. The OT can use that information to prioritize recommendations before they even walk through the door.
7. How to talk with a loved one about safety changes
Resistance to home modifications is almost universal, and it’s not stubbornness. It’s a reasonable response to changes that can feel like a public announcement that independence is slipping.
The framing that works: Present every change as a tool for staying in the home longer, not as evidence that something is wrong. “This grab bar means you don’t have to wait for me to be here before you shower” lands differently than “I’m worried you’re going to fall.”
Occupational therapists consistently note that how changes are framed affects whether they get used. A grab bar that feels imposed tends to go unused; one that the person helped choose tends to become habit within days.
Practical steps:
- Ask permission before making any change: “Would it be okay if we tried this for a month?”
- Prioritize one change at a time — not a full renovation in a weekend
- Offer a trial period with the explicit option to reverse the change
- Involve the senior in choosing products (color, style, placement) wherever possible
Pro Tip: Avoid framing safety changes as a response to a specific incident (“after what happened last Tuesday…”). That ties the modification to a moment of vulnerability. Instead, frame it as something everyone in the household is doing: “We’re updating the bathroom for everyone — I want better lighting in there too.”
For seniors who share their home with a dog, pet-related trip hazards (leashes on the floor, food bowls in walking paths, sudden movements) are worth addressing alongside the standard checklist. The Ipuppee guide to dog safety for elderly owners covers practical ways to reduce pet-related fall risk without separating a senior from a companion they depend on.
8. Room-by-room printable checklist
Walk through the home with this list and mark each item Yes or No. Any “No” is a next action.
Entryway and exterior:
- [ ] Threshold ramp or flush entry at front door
- [ ] Handrail on all exterior steps
- [ ] Motion-sensor light at entry
- [ ] Deadbolt lock and peephole or video doorbell
Living room:
- [ ] All walking paths clear of cords and furniture edges
- [ ] Throw rugs removed or secured with non-slip backing
- [ ] Seating at a height that allows easy sit-to-stand
Kitchen:
- [ ] Frequently used items stored between waist and shoulder height
- [ ] Non-slip mat in front of sink
- [ ] Fire extinguisher within reach of the stove
Bathroom:
- [ ] Grab bars mounted into studs at tub, shower, and toilet
- [ ] Non-slip strips on tub and shower floor
- [ ] Water heater set to 120°F
- [ ] Night light installed
- [ ] Shower chair or transfer bench available
Bedroom:
- [ ] Night light or motion-sensor light on path to bathroom
- [ ] Phone or medical alert device within reach of the bed
- [ ] Bed at a height that allows feet to rest flat on the floor when seated
Outdoor paths:
- [ ] Walkways clear of debris, ice, and uneven pavement
- [ ] Handrails on all outdoor steps
- [ ] Adequate lighting at all exterior doors
What working with seniors and pet owners taught me about home safety
Most home-safety guides treat the checklist as the finish line. In practice, the checklist is just the beginning. The harder part is getting the changes accepted and actually used — and that’s where working with older adults who also have dogs taught me something the standard guides miss.
Seniors who share their home with a pet often have a clearer motivation to stay mobile and independent than those who don’t. The dog needs walking. The dog needs feeding. That daily structure is protective. But it also introduces hazards — leashes underfoot, food bowls in doorways, a dog that bolts toward the door — that a standard home-safety checklist never addresses.
The Ipuppee resource on dog-friendly senior living gets at something I’ve seen repeatedly: the best safety plan is one that fits the person’s actual life, including the animals in it. A grab bar that conflicts with where the dog sleeps won’t get used. A night light that the cat knocks over every night gets unplugged. Safety changes stick when they’re designed around how someone actually lives, not around an idealized empty home.
The same principle applies to every modification in this guide. Start with the person’s daily routine, then work backward to the hazard.
Sources
Verify program details — Medicare Advantage coverage, local grants, and AAA programs change frequently. Always confirm current eligibility and coverage directly with the source or a local agency before planning a budget around them.
- Preventing falls at home: room by room | National Institute on Aging
- Top Ten Safety Checklist for Older Consumers — U.S. Consumer Product Safety Commission (CPSC)
- Home Safety Tips to Protect Your Aging Parents – AARP
- Household safety checklist for senior citizens — Mayo Clinic Health System
- Data and research — Falls — CDC
This article is general information, not a substitute for advice from a qualified doctor. Consult a qualified healthcare professional about your own circumstances before acting on anything here.